![]()
![]()
![]()
![]()
![]()
![]()
![]()
![]()
![]()
![]()
![]()
![]()
![]()
![]()
![]()
![]()
![]()
![]()
![]()
![]()
![]()
Recaro Seats
 If
you've ever planted yourself in a seat made by
Recaro, you
probably figured out how fantastic they are compared to most of what is supplied
from the factory. They are so good, in fact, that many high-end cars come with
variations of them as standard equipment. Otherwise, they can sometimes be ordered as an upgrade, especially in
the later-model Mustangs. If you've never sat in one, then you just don't know
what you are missing. A
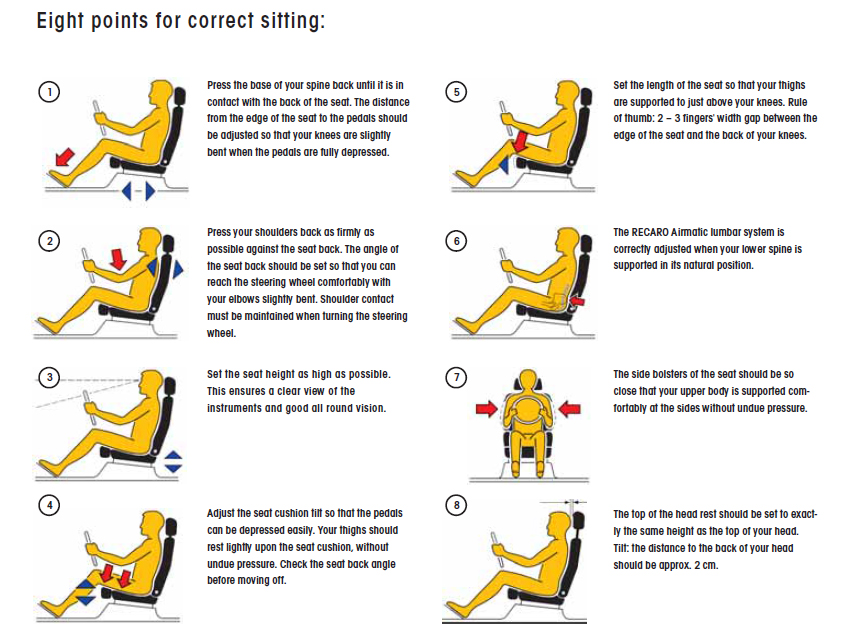
correct seating position is a must for any serious driving, and good seats
go a long way there. These seats were actually one of two items I
was able to sample in my buddy Tony's '01 Kenne Bell Cobra (the other being an
upgraded stereo), so he deserves equal part credit and blame for getting me
hooked!
If
you've ever planted yourself in a seat made by
Recaro, you
probably figured out how fantastic they are compared to most of what is supplied
from the factory. They are so good, in fact, that many high-end cars come with
variations of them as standard equipment. Otherwise, they can sometimes be ordered as an upgrade, especially in
the later-model Mustangs. If you've never sat in one, then you just don't know
what you are missing. A
correct seating position is a must for any serious driving, and good seats
go a long way there. These seats were actually one of two items I
was able to sample in my buddy Tony's '01 Kenne Bell Cobra (the other being an
upgraded stereo), so he deserves equal part credit and blame for getting me
hooked!
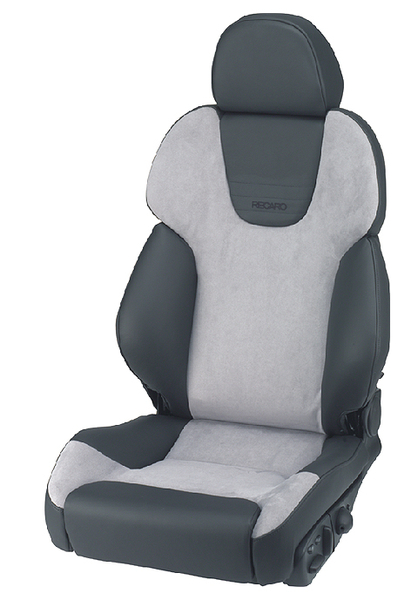
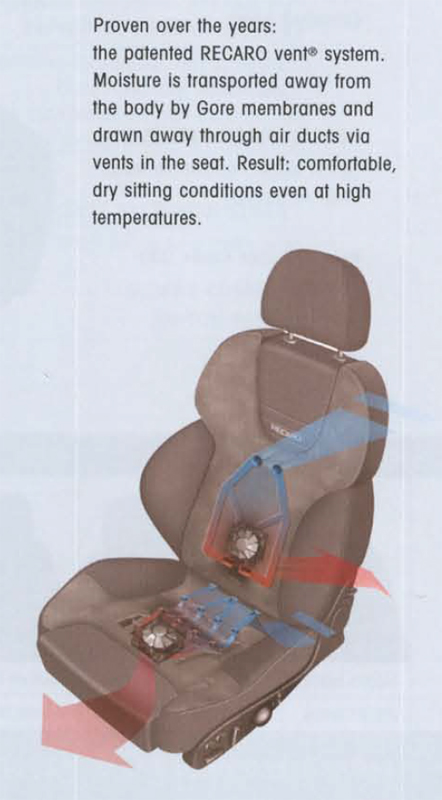
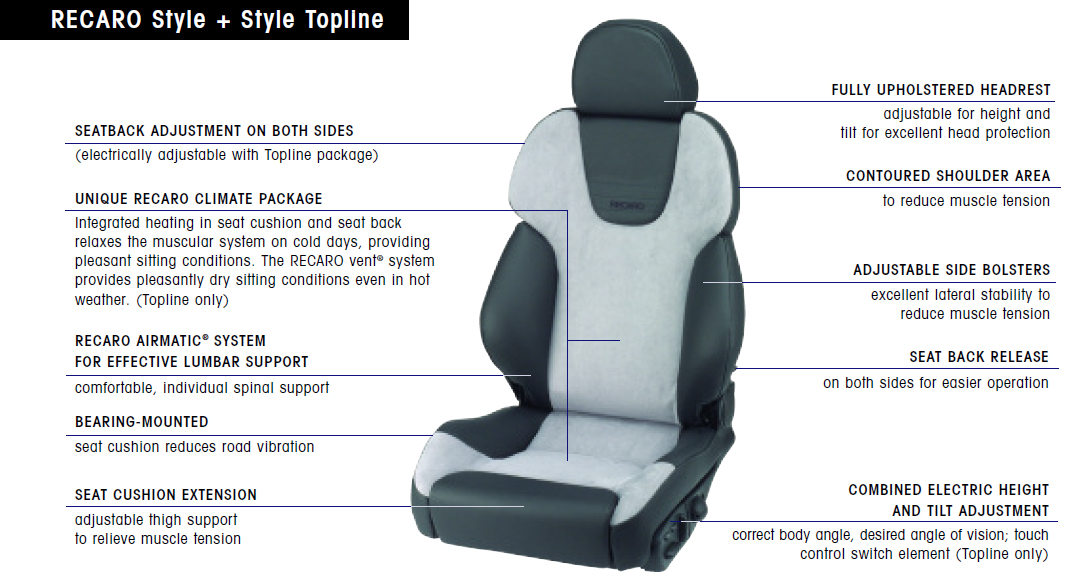
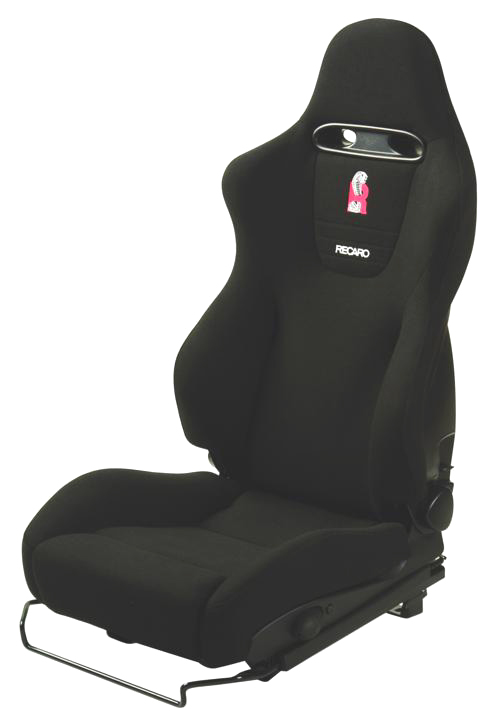
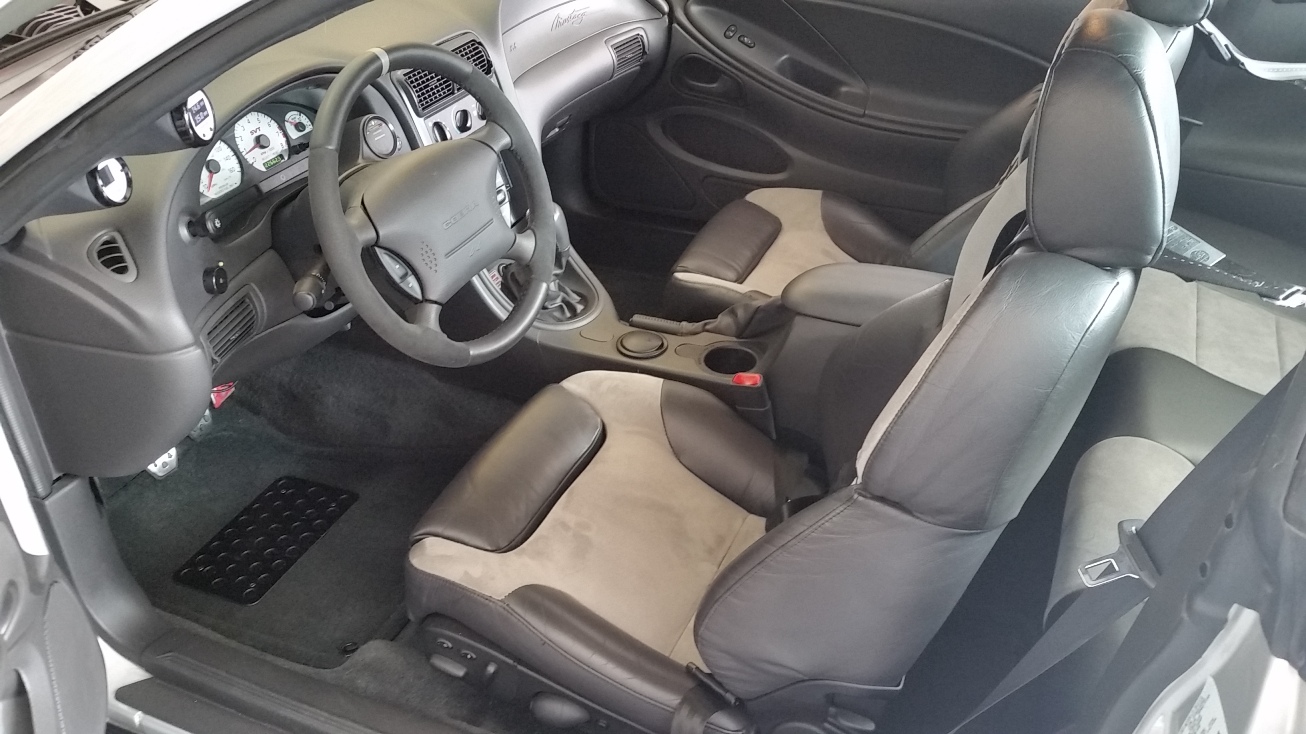
So in my never-ending quest to make my Cobra in to a version that was ideal for me, premium seats became mandatory. I definitely wanted the Recaro Style Topline, and although they are now discontinued, I was able to get my hands on a slightly used set for a great deal (probably a good thing since they were over $4,000 when new!). In the "Topline" configuration, they are fully powered both vertically and in recline, heated, and vented. Also, there is a manual lumbar function, multi-position headrests, and adjustable side and under-thigh bolsters. In short: they rock.
The project of adapting them was not overly complicated, and when it was all said and done, they look like they could have come from Dearborn. Fortunately, the Recaro "black" leather is about a 99% match to the Ford "Dark Charcoal", and even though mine had different colored inserts, a local upholstery shop retrofitted them with the correct "Medium Graphite" Alcantara. Big difference! Since my factory seats still were good as new, I was able to sell them and recoup some funds to offset the cost here. Awesome.
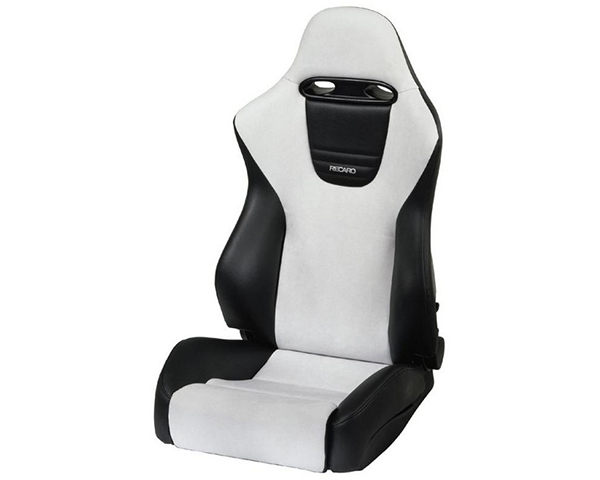
With my Cobra R theme going, I actually did come close to landing a pair of those seats from 2000, but decided to pass. Although they used to be sold by FRPP as M-16620-C, they can only be found on the used market now - and that is not entirely common. Like anything "R", they also go for big dollars when they come up. If you have to have a seat like this, they actually are just the base version of the Recaro Sport seat (in black cloth), so they are still available - without the "R" logo, of course. Since they lack any sort of power or bells and whistles of the Topline version, I decided against them, but I will admit that they are incredibly comfortable. If you want to stay "basic", these are also a great choice.
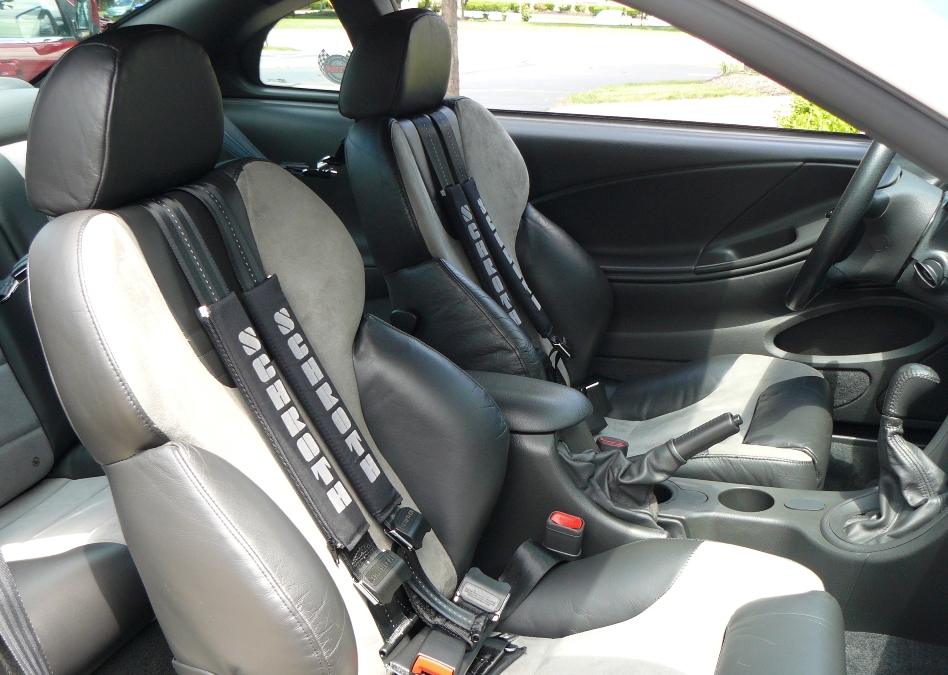
In all fairness to the Sport, they do come in the Topline configuration, and had I not been able to score my set, they would have been my second choice. They did, however, lack a few things that I decided were must-haves. The first is the adjustable headrest: for any long drives, this really comes in handy. Next, I didn't want the fixed shoulder harness passages. If I was just going to make a quick blast somewhere and wanted to just use the factory belts, the Schroth harnesses can be swung out of the way easily (or it gives a passenger that option all the time). Finally, the Style just had more of an OEM look, and very cool it is!
Note: Since I mentioned these seats are discontinued, not to worry if you happen to like them as well. For whatever reason, Recaro no longer makes this version, but they have another which is considered the "XL". They are identical to the regular Style with the exception that they are 60mm taller. I believe these will fit fine in a Mustang, but with the extra height, the vertical motion will be obviously limited. Still, they are an option like the Sport, and worthwhile if you have pockets that are deep enough!
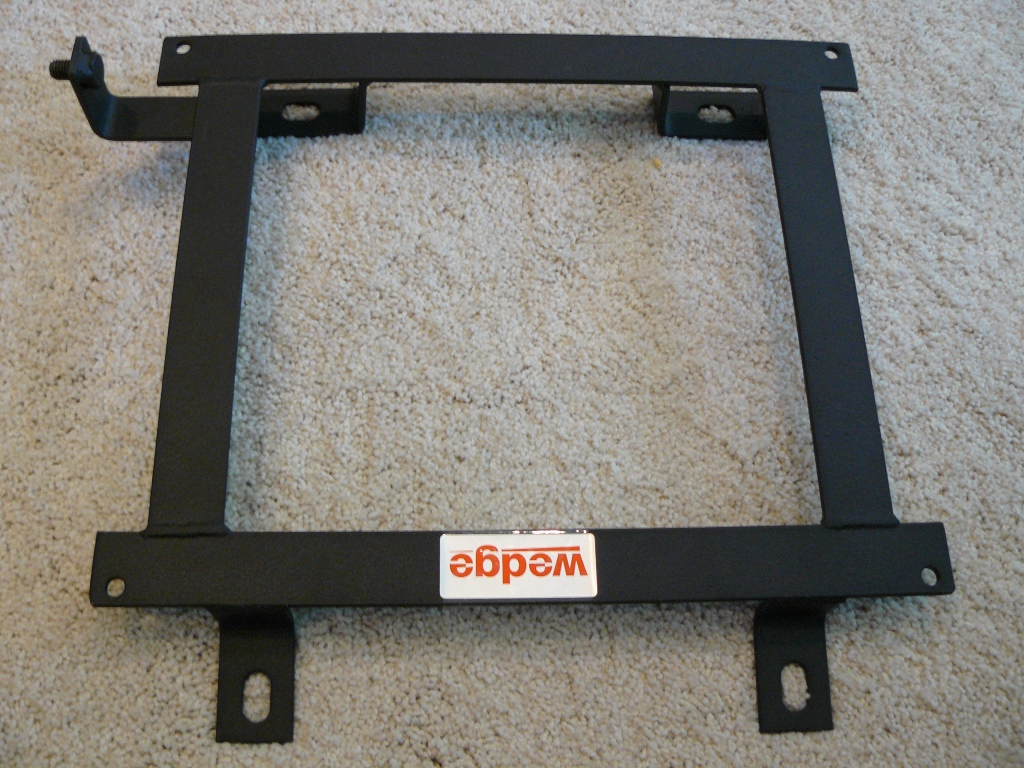
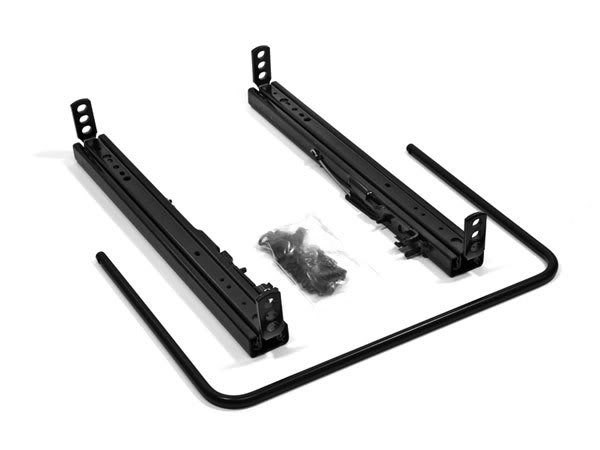
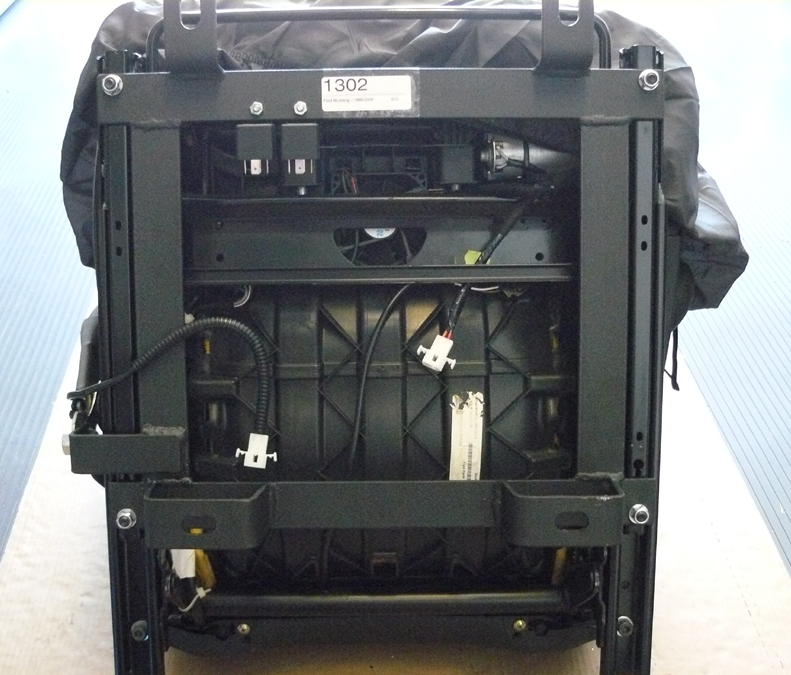
Once you have the seats, you basically need just two more items: sliders and bases (also referred to as brackets). Since both seats are electric, there was some wiring involved, but more on that shortly. First off, the bases, which are shown below. These came from Wedge Brackets, their part numbers 1302 & 1303 (which are unfortunately now discontinued), and allowed the seats to attach at the factory bolt and stud locations. On top of these "flat" bases mount the sliders, which are the Recaro 0.70.9NT, with an "inside" mounted handle (thanks to former Ford engineer Dean Martin at KohR Motorsports in Westland, MI for coming through here). These new sliders are actually manual for both sides, but that didn't bother me since the power slider on the original driver's seat was ridiculously slow anyway. Good riddance. Even better, the sliders are seriously heavy-duty, so they beat anything that is OEM, hands-down.

Anyway, the seats bolt to the sliders, the sliders to the bases, and in they go - almost. Since they are electric, and each seat has a two-wire plug under it with power and ground, this theoretically makes wiring them easy. I actually didn't want them wired hot since the fan and heat switches are not momentary-contact (they'll drain the battery if wired hot and then left on!), and although it would have probably been easy to just find switched power somewhere, I wanted to make use out of the original seat circuit. That circuit is actually split in to two, which is perfect since I now have two powered seats to make use of it, but unfortunately, the circuit is not switched. This is where I actually got a great idea - again - from the aforementioned Tony. By the way, he also has his own site laying out all the modifications on his '01, Taz Cobra, so check it out (What can I say, great minds think alike!).
Note: I chose the flat bases and sliders since I did not need any additional height out of the seats, which would be provided by "tabbed" sliders. My sliders have an "NT" after the part number, for "non-tabbed", in contrast to the tabbed sliders which are just 0.70.9. If you want an extra couple inches of lift, this is the way to go, as long as you get matching bases (I'm 6' tall, so they weren't necessary). Simply enough, these sliders have a 90° downward bend at each end, and bolts to the bases through multiple holes. The seat can be canted, or set in at different heights to accommodate drivers of varying statures. Also, when it comes to the flat bases, when the seat is lowered fully, it will not slide back and forth easily since the "bucket" underneath will contact the cross-braces of the base (it always has to be raised slightly before sliding). Food for thought.
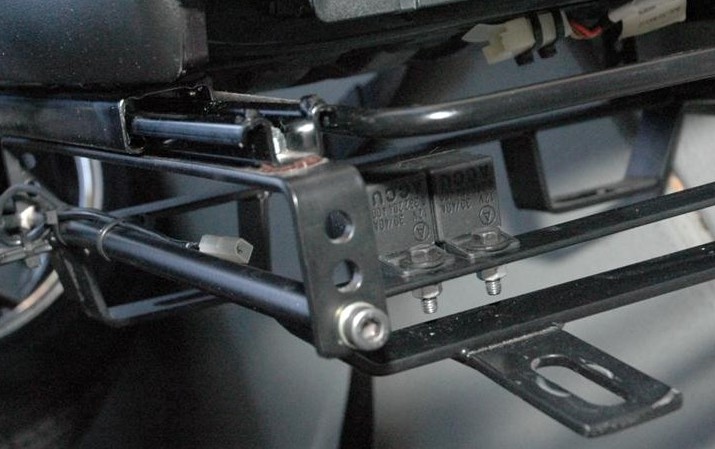
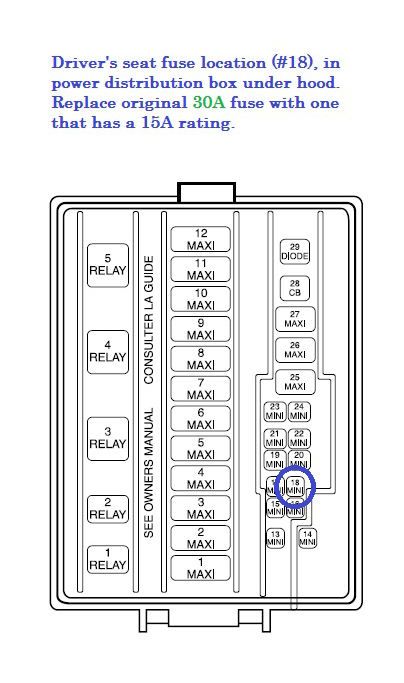
With the existing seat circuit to use, the original 30A feed for the driver's seat becomes its main power source, and the 15A feed for the lumbar is then used to power the passenger seat. Simple enough. Since only a 15A circuit is required for each (the draw is actually much less), the original 30A fuse is replaced with one of the lower rating. Also easy. As for both of those fuses the first is located in the battery junction box (under the hood), and the second is in the passenger compartment fuse panel.
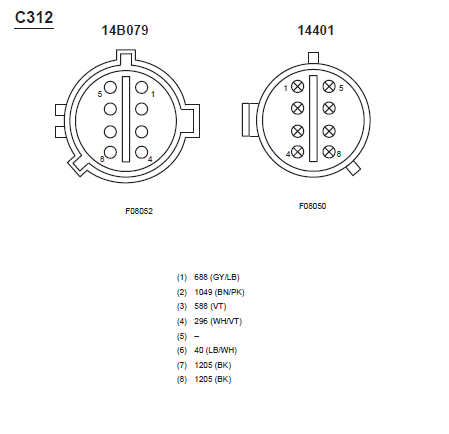
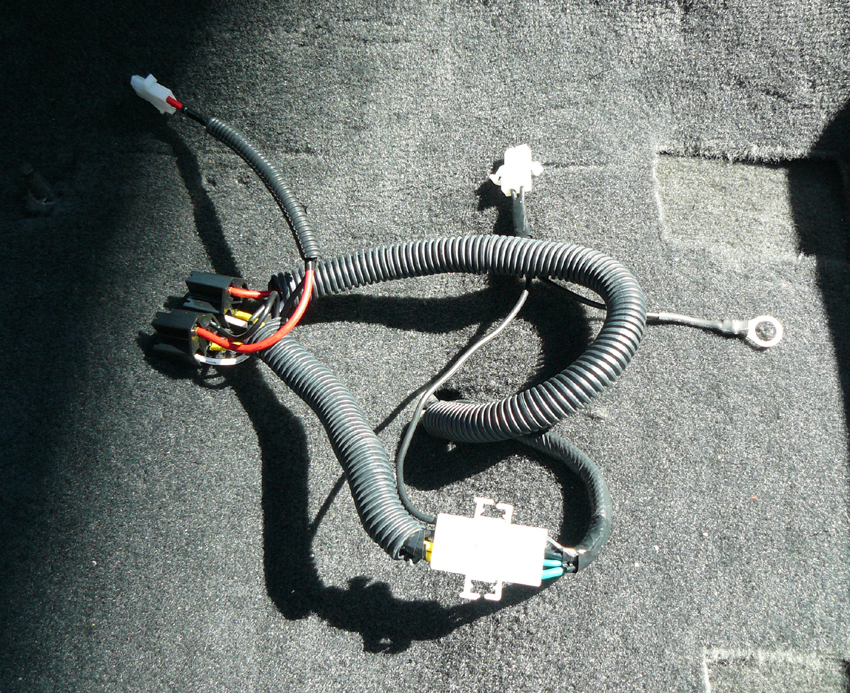
The downside to this is that once you cut the factory connectors off the harness to splice in new ones, you've essentially passed the point of no return. That didn't actually matter since my original seats were heading out to a new owner, but sometimes is a bit disconcerting to cut factory wires! In any case, the new harness would be built now with two relays and then have a switched power source that was tapped in to the convertible top switch wiring, connector C312, which is fed by 15A fuse #20 in the passenger compartment panel. Since this is present under the shifter bezel in both convertibles and coupes, it made access to it easy.
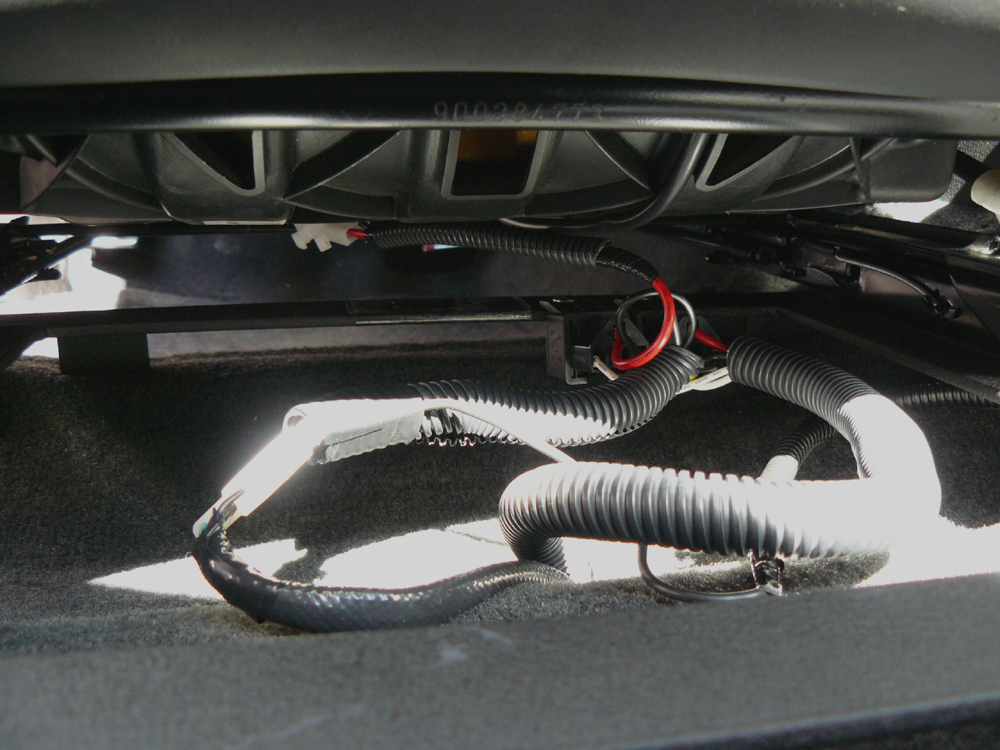
The new harness is shown below with the relays - the left for the driver's seat and the right for passenger. Since both of the original wires from each fuse panel terminate in this location, it was perfect to bundle the relays together and mount them on the driver's seat base. It looks crazy, but the wiring fits under the seat just fine! For the passenger seat, it was a matter of running the small harness around the center console and pulling it up under the seat, which was simple. Both of those ends along with the main harness were given new connectors, and all relays and small parts were acquired through Parts Express for one-stop shopping. Overall, it was straightforward and works perfectly. I actually have not drawn up a wiring diagram yet, but with any luck, I'll get one made in AutoCAD soon enough to share, so stay tuned.
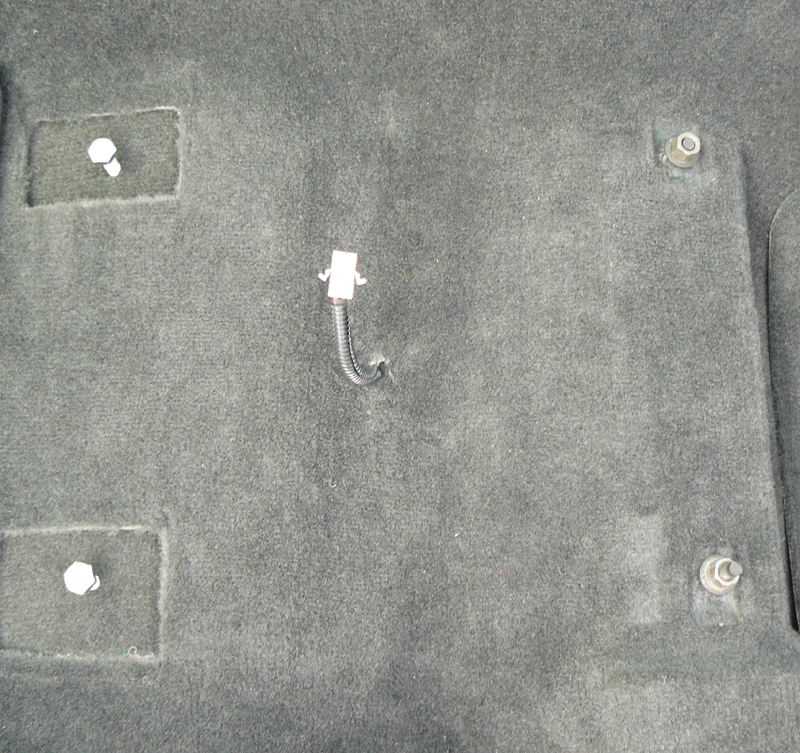
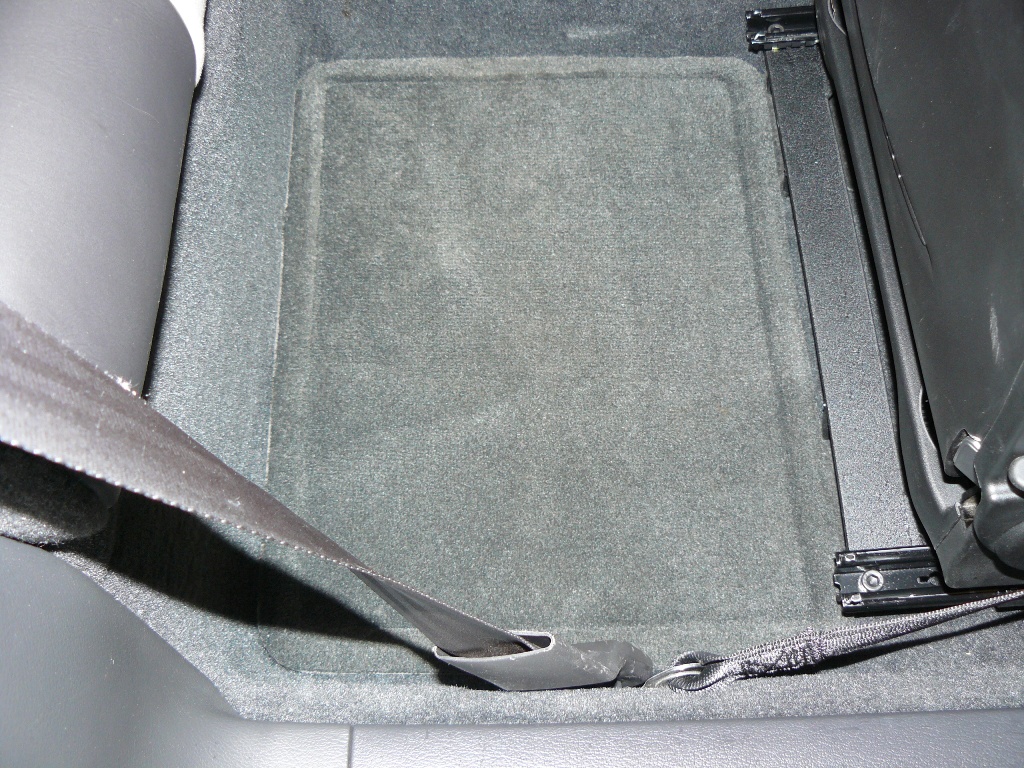
In the pictures above, you can also see small pieces of carpet that were used to fill the holes left from the factory seat bases. I cut them from a spare floor mat, but then decided not to use them since the back mounts ended up with a bit of "squish" under them. Instead, I mounted the bases directly to the floor and then cut more pieces out of the mats to fit on top of the bolts in order to fill the open area. Unfortunately, the aftermarket bases lack the plastic covers that are used on the OEM set, so if you are particular, you may want to fill them and make it look nice. One other bonus is that the new bases add some more room on the rear floor, so my Fusion mats fit perfectly and look original (they are the exact Dark Charcoal). Not that I'll ever have a passenger back there, but I still like the idea of keeping the carpet covered and pristine.
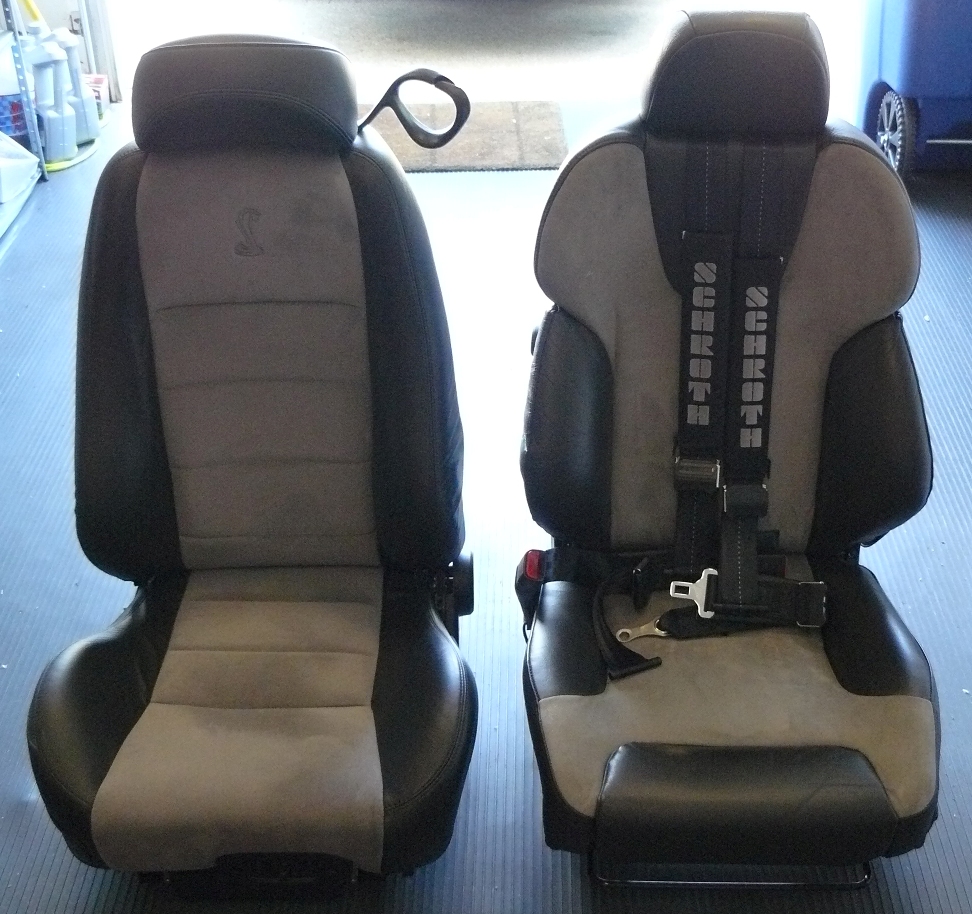
As it turned out on install day in the summer of '13, it was hot, humid, and there was not a cloud in the sky. Adding to that, my regular digital camera was indisposed temporarily, so I was left to just snap a few pictures with my phone that didn't turn out all that great, especially with the sweat pouring in my eyes. At the very least, the comparison shot in the thumbnail gives a good idea as to how the Recaro and factory seat stack up to each other, so that helps despite the poor quality of the image. Also, the bases and sliders are shown mounted below, along with the relays and the seat wiring ready to connect to the new harness in the vehicle. In each picture, one of the two fans can be seen as well (the other is in the seat back and vents out through holes in the rear cover). With the seats all complete, it was simply a matter of setting them in the factory location, connecting the wires, installing the bolts and nuts, then mounting the Schroth harnesses.

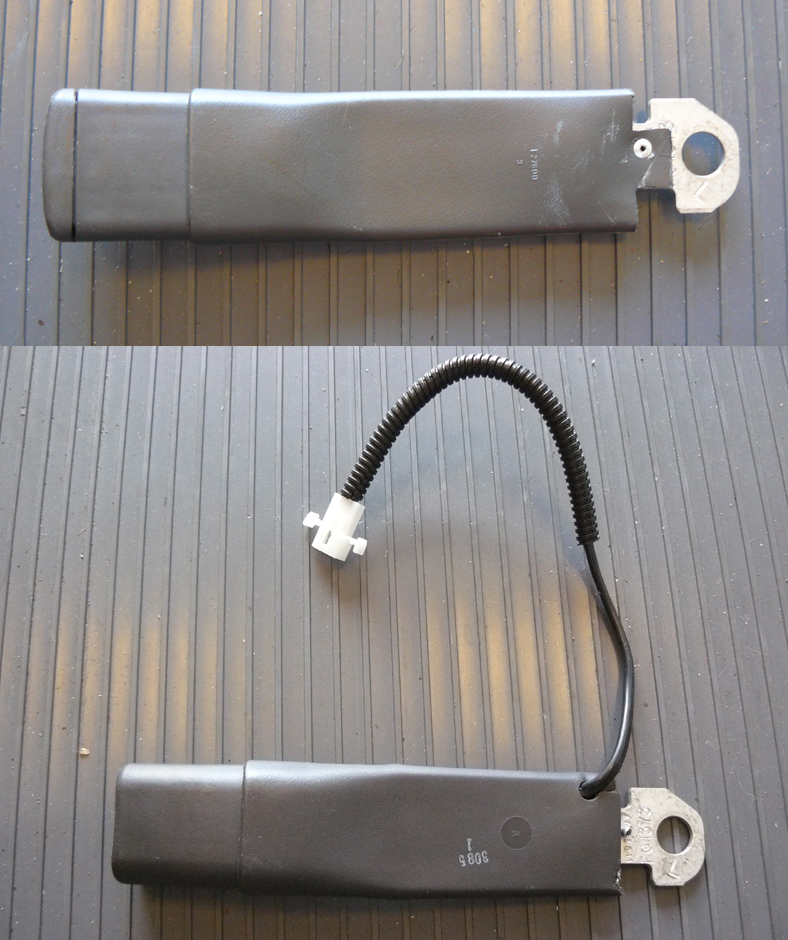
Along the lines of Schroth, one small bit of field engineering was needed to make them fit: the original seat belt buckle needed some of its plastic cover trimmed so they could mount to the studs on each base along with that end of each harness. Since the stud is a bit short (see the pictures up top), the space is limited when you retain the original buckle, add a new harness end, then place on a nut. It wasn't a big deal, but by removing a small metal flange that holds the buckle cover, then just riveting the cover down, it saved some space and gave me the room to package it all on the stud.
 More
info on the harnesses is on my Interior page (where
you probably just were before coming here), but I can't say enough good things
about them. They mount easily to the C-pillar and to each end of the factory
belt and buckle, and are a huge improvement over the simple belt that is
standard. Actually, the main harness was laid on each seat first, but the tail
straps were already attached to the rear. After the seats were installed, the
outer ends were sandwiched to the original belt end on the floor and the tail
straps were then buckled. Other than the glitch with the factory buckle (shown in the thumbnail), the
new harnesses went on easily and are a real bonus when the roads get curvey.
More
info on the harnesses is on my Interior page (where
you probably just were before coming here), but I can't say enough good things
about them. They mount easily to the C-pillar and to each end of the factory
belt and buckle, and are a huge improvement over the simple belt that is
standard. Actually, the main harness was laid on each seat first, but the tail
straps were already attached to the rear. After the seats were installed, the
outer ends were sandwiched to the original belt end on the floor and the tail
straps were then buckled. Other than the glitch with the factory buckle (shown in the thumbnail), the
new harnesses went on easily and are a real bonus when the roads get curvey.
Even with the improved harnesses, they can be swung out of the way with little effort in the event that the original belts come back in to play. If you are also using aftermarket belts, or planning on using them, don't forget that when there is no buckle in the original driver's side receiver, it will trigger the BeltMinder warning light and chime. No worries there though - it can be deactivated easily enough through the owners manual procedure. Once that is accomplished, the light will come on for a couple minutes when the vehicle is started, but the chime stays off.
Overall, I couldn't have been more pleased with how the new seats fit, especially with the added comfort and expanded functions. Although they both weigh in at about 60# each, the extra weight is entirely justified. Even though I made it a point to lighten up the front end, I figure these help shift the center of gravity just a touch rearward, so I am fine with that. For a bit more on them, check out the factory parts manual to see the line completely broken down. That may annoy the rep at Recaro since it took serious coaxing to acquire it, but it's definitely worth sharing. The seats are just a huge improvement, and that has made driving even more enjoyable, so I'm glad to spread the word as much as I can!
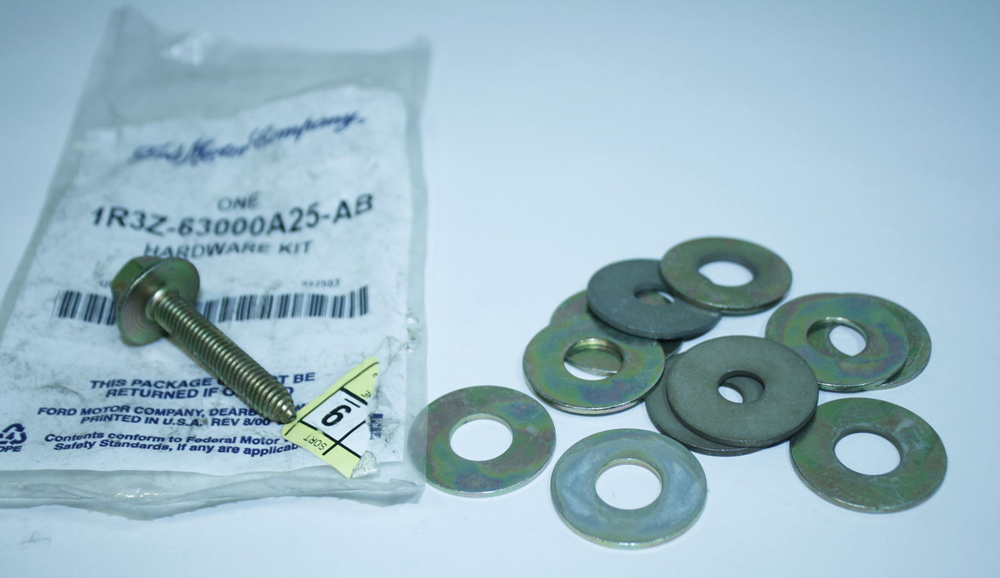
Note: Now that I mentioned how well they fit, I will add that the passenger seat is still a bit snug against the door panel, which was also the norm for the factory seats. If you still have the original set and want to alleviate this issue, see TSB 03-01-05 for the fix (also listed in the TSB tab at the left of each page). Basically, the upper half of the seat is removed and shimmed inward (towards the transmission tunnel) with the kit from Ford: 1R3Z-63000A25-AB. If you stay with the OE seats, might as well make sure both fit perfectly!