![]()
![]()
![]()
![]()
![]()
![]()
![]()
![]()
![]()
![]()
![]()
![]()
![]()
![]()
![]()
![]()
![]()
![]()
![]()
![]()
![]()
Cooling
 Featured
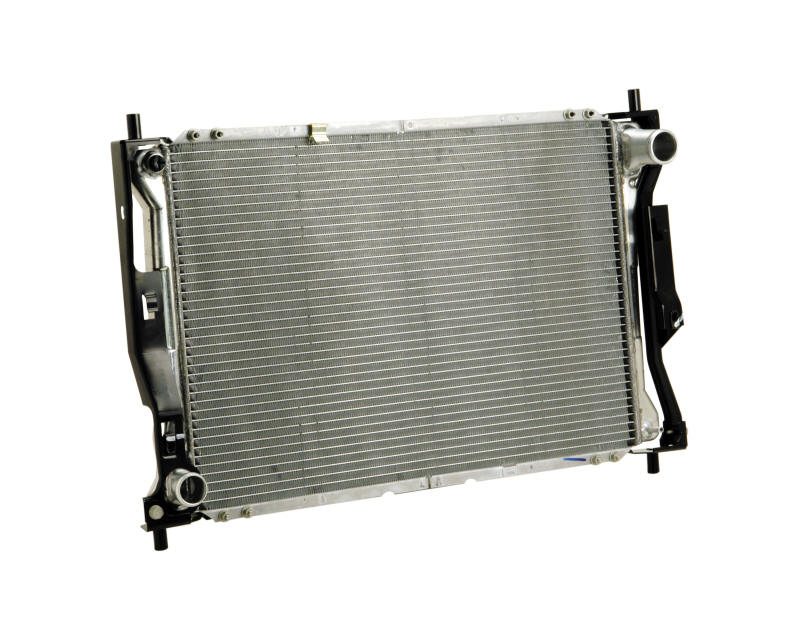
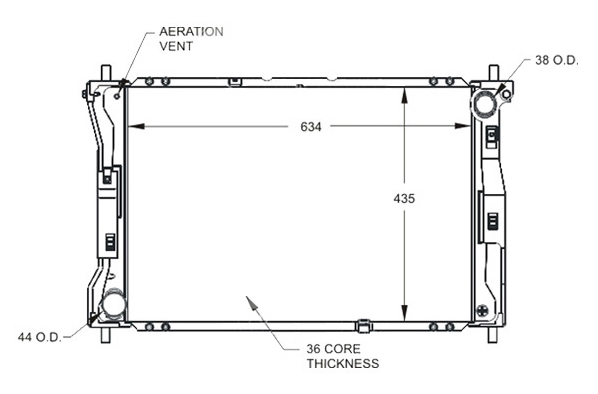 When the Terminator entered the scene with
supercharged power, it also required an upgrade to the cooling system, which
includes the radiator as well as the new oil
cooler. I actually didn't add anything special here, but it's still worth
mentioning them since both components do
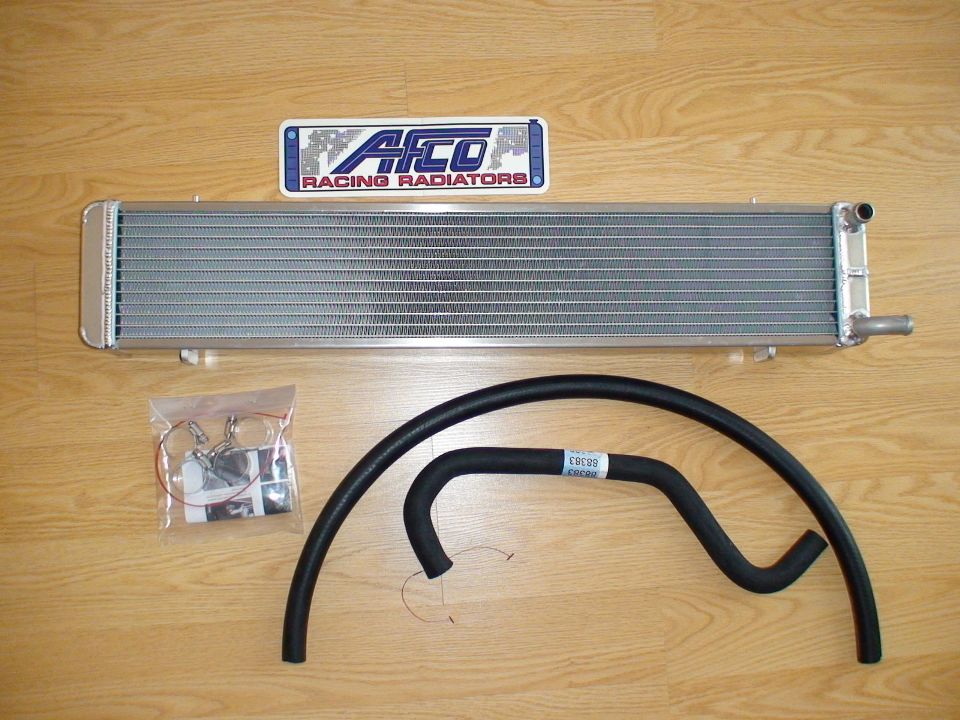
a pretty decent job overall. The all-aluminum radiator has a 1.5" thick, two-row core
which is a step up from the earlier 1" Cobra and GT versions (those
also utilized crimped-on plastic tanks). For several years, Ford Racing even sold the exact same radiator as
M-8005-C03
- formerly 3R3Z-8005-AA, also seen above - which was a
popular upgrade for all '97-'04 SOHC Mustangs (the Mach used the same radiator
as the Terminator). If you happened to pick one of these
up as a spare, consider yourself lucky since they are yet another part that is
long gone.
When the Terminator entered the scene with
supercharged power, it also required an upgrade to the cooling system, which
includes the radiator as well as the new oil
cooler. I actually didn't add anything special here, but it's still worth
mentioning them since both components do
a pretty decent job overall. The all-aluminum radiator has a 1.5" thick, two-row core
which is a step up from the earlier 1" Cobra and GT versions (those
also utilized crimped-on plastic tanks). For several years, Ford Racing even sold the exact same radiator as
M-8005-C03
- formerly 3R3Z-8005-AA, also seen above - which was a
popular upgrade for all '97-'04 SOHC Mustangs (the Mach used the same radiator
as the Terminator). If you happened to pick one of these
up as a spare, consider yourself lucky since they are yet another part that is
long gone.
On a good note, there are a few aftermarket versions out there. The first is made by Mishimoto, and is a direct fit. Their earlier models were actually too thick to mount without some modification, however I understand the ABS module has to be loosened in order for this radiator to drop in - not that big of a deal. In a similar fashion to the OEM radiator, it is also has a 1.5" core and is mounted in steel "stabilizer" brackets (they actually hold U.S. Patent D703126 for them), which are a great option to keep the cracks away. There is an installation video on their site (also found on YouTube) that really makes it look like a nice product.
A second option comes from Fluidyne. From the pictures I have seen, it looks to be too thick for a direct fit which means modifications are involved. That possibly involves moving the ABS module, tweaking the fan mounts, or relocating the coolant tank for the supercharger. Still, plenty of guys have made it work.
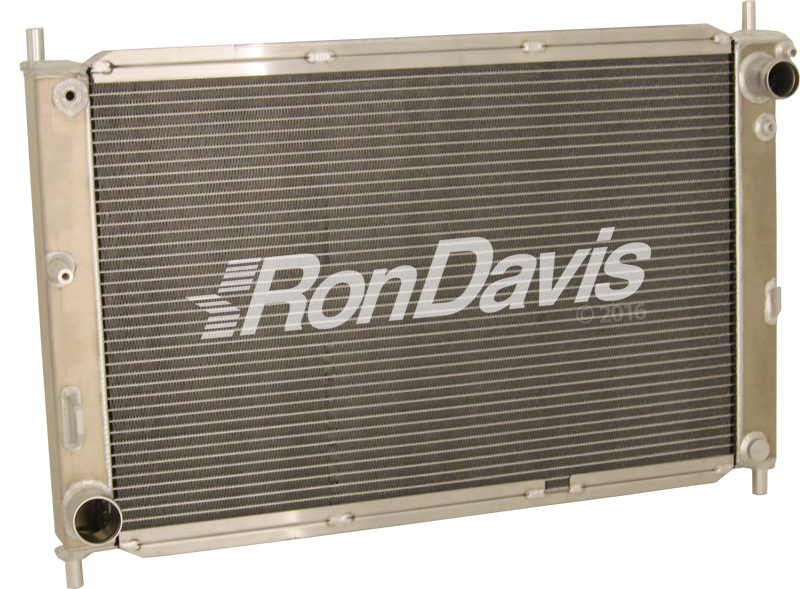
Finally, a custom version is made by Ron Davis Racing of Glendale, AZ. I have no knowledge of this, their 1-50MU0304, but wanted to list it as an FYI. From what I can tell, it is 2" thick (with two 1" cores) which would probably mean some modifications are involved. Anyway, it is out there, and even better, is all aluminum for those that might be interested. If you need a new one and don't have any luck on the used market or with repair, any of these could do the trick.
While on the subject of the radiator, it's also worth mentioning the cooling fan: it actually is not specific to the Cobra and is standard on any 2001 - 2004 4.6L Mustang. Unlike so many parts out there that have become obsolete, the fan assembly is available through Ford and many other aftermarket sources (the internet is your friend). The Ford part number had been updated to 3R3Z-8C607-AA, and is also RF-166 through Motorcraft. These fans are quite effective - and durable - moving right around 1,800CFM of air in low-speed, and about 2,200CFM in high-speed.
If you start searching the internet for Cobra radiators, there may be some that pop up once and a while and are definitely worth snatching up. Luckily, my original radiator - with a whopping 22,000 miles behind it - is still good as new. I am glad I did pick up a spare OEM radiator to stash away, but I've had zero issues so far and am sure it will stay that way. If you have to have a factory part, this radiator is one that is worth keeping your eyes open for since they definitely work.
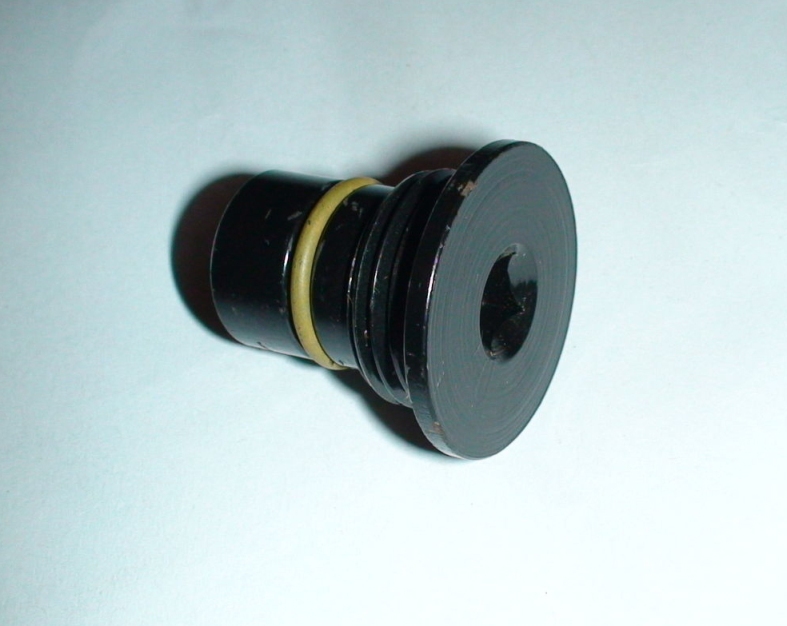
Note: When doing maintenance on any part of your cooling system, you've probably discovered the nightmare of un-corking the crossover pipe. Not only can its plug be brutal to remove (the 1/4" drive slot in it was a really bad idea!), the o-rings can then get damaged if you take the whole assembly out. As for the plug, I replaced mine early on with a custom stainless steel hex head piece made by Jay Richmond of Columbia, SC (he is "98mark8lsc" on various forums, or you can e-mail him directly at jay.richmond@gmx.com). It not only looks fantastic, it is also easy to remove. Jay also makes them tapped if you chose to use a temperature sender, but feel free to shoot him an e-mail if you'd like one of either style. If you want to simply replace the original, the Ford part number is F3LY-8A500-A. As for the crossover tube o-rings, they are also available through Ford as 391533-S100 and conveniently sold in packs of three. Once that is all taken car of, purging the cooling system is not all that complicated, but the procedure from the Ford service manual is definitely good to have - especially since you must get the air out to avoid overheating!
![]() Unlike
elements of the chassis, stiffer isn't always better, especially when it comes
to mounting the radiator. With a bit of flex up front, coupled with relatively
firm rubber in the original mounts (which are anchored by steel brackets), the
tanks have been known to crack.
This is especially true with higher horsepower cars, and more so those with
aftermarket radiators, but it could still happen to a factory radiator.
Unlike
elements of the chassis, stiffer isn't always better, especially when it comes
to mounting the radiator. With a bit of flex up front, coupled with relatively
firm rubber in the original mounts (which are anchored by steel brackets), the
tanks have been known to crack.
This is especially true with higher horsepower cars, and more so those with
aftermarket radiators, but it could still happen to a factory radiator.
Just to be on the safe side, I wanted to do what I could to prolong the life of my radiator, and fortunately, there is a perfect solution: Mishimoto aluminum "radiator stays". They do a great job of holding the radiator in place, but also allow a small amount of flex due to more pliable bushings. Even better, the bare finish is a nice match to my Silver Metallic paint, so they don't stand out at all. It's nothing very exciting, but sometimes you have to put smart money on parts that are functional. The picture below is actually from my SVT Stuff page, with the new mounts visible at the back corners of my "custom" radiator cover. So far, so good!
Note: Since I threw in the above picture of the radiator cover, I suppose I can't leave out details on them. When I don't have the show piece on, I'm fine with the OEM part - it's not pretty, but it works. They are still available through Ford, part number 2R3Z-8C291-AA, and can be scored for just over $40. If you are someone who loves the metal covers that have the "Terminator" etching on them, they can be found online through various sources. Those seem to be popular with the younger crowd, but some of us still like the factory parts.
 An
often overlooked area when it comes to improved cooling is the water pump. Even with the upgraded radiator and oil cooler, the
Terminator could still benefit from a water pump that is a step up from stock,
especially when additional heat is generated under higher boost and horsepower.
Although the factory pump is adequate for a stock or mildly-modified engine, there are always compromises when it
comes to cost versus performance that leave room for improvement.
An
often overlooked area when it comes to improved cooling is the water pump. Even with the upgraded radiator and oil cooler, the
Terminator could still benefit from a water pump that is a step up from stock,
especially when additional heat is generated under higher boost and horsepower.
Although the factory pump is adequate for a stock or mildly-modified engine, there are always compromises when it
comes to cost versus performance that leave room for improvement.
Water pumps are simply centrifugal pumps where the "fluid" is drawn in to the low pressure hub and then forced outward via centrifugal force by the impeller blades. As RPM's increase, the velocity increases, which in turn puts pressure on the overall system while still pulling fluid in to the center (technically, velocity and pressure are inversely related, but there is still going to be pressure there). The pressure developed is directly related to the impeller size and shape, the number of blades, inlet size, and the speed of rotation, which also dictates how much power is needed to turn the pump. There is actually quite a lot involved on the engineering side of these, and without getting too much in to fluid dynamics, it is really all about flow rate for us. Simply put, lack of flow, especially at higher RPM's means less cooling.
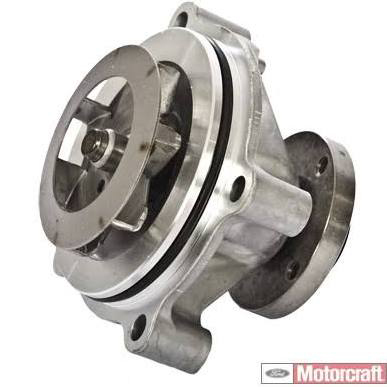
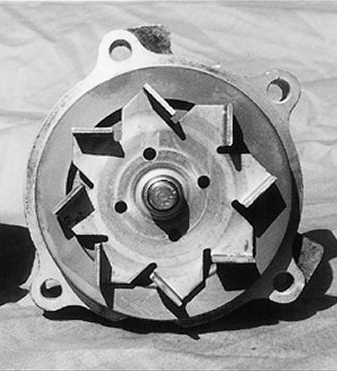
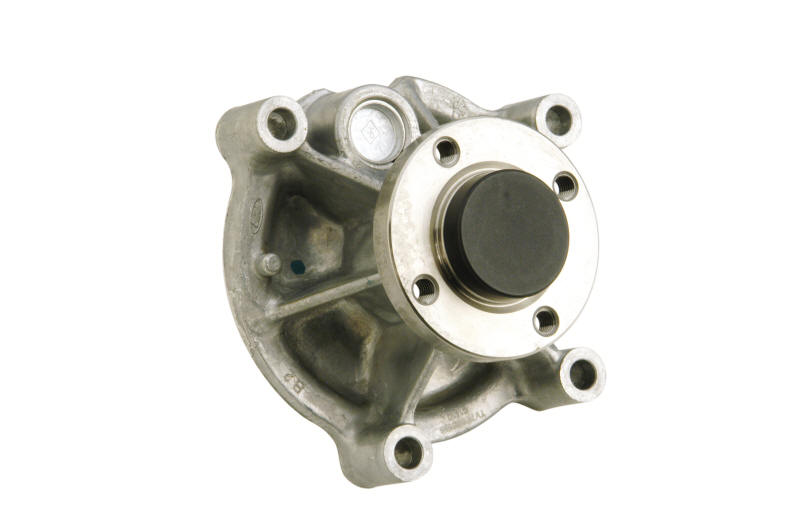
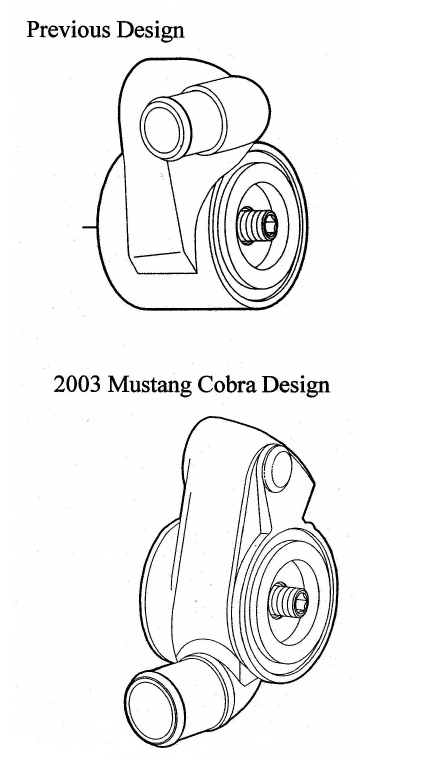
As for the factory pump, one of its shortcomings is the stamped impeller. Its design is prone to low flow as well as "cavitation", or the formation of vapor cavities, at higher speeds due to aeration from an excessive pressure drop. Once this starts, the pressure drop leads to instant vaporization of the coolant, which cannot be moved by the pump. The Terminator pump (below, left) was an upgrade from previous Cobra models with its "shrouded" impeller, but I suspect the outer ring was added after the fact to give support to the stamped blades, which can really get beat up. The picture below center also shows the earlier Cobra pump, without the support ring, giving an idea as to how much area exists between the blades.
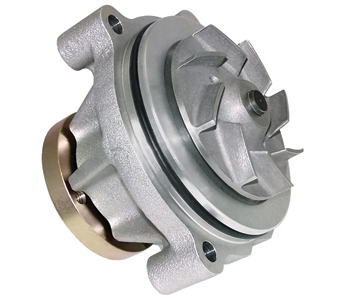
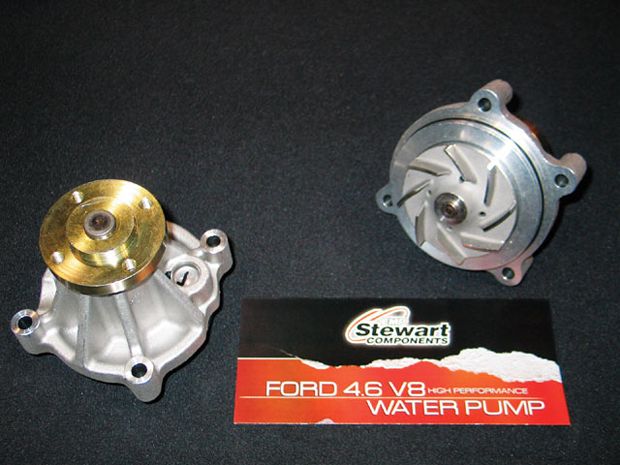
After all that, my pump of choice comes from Stewart Components up in Escanaba, MI. Their 50046S model (shown in the thumbnail and above, right), is probably one of the nicest pumps out there. What makes it suitable for high-performance use is, among other things, the upgraded impeller - similar to the Ford GT pump - that delivers an improved flow rate while requiring less power. The folks at Stewart state this pump takes less than 3HP to operate (although the stock version isn't too far behind) and with an increased flow, it is still able to maintain more pressure. If you'd like even more detail on it, one of the engineers at Stewart was nice enough to send the comparison charts that show all the numbers. Mine is on the new Aluminator, and so far is performing flawlessly. This pump is definitely a great upgrade for any Cobra owner, even if the engine is still stock.
Note: The OEM water pump, once available through Ford Racing as M-8501-F46, is still plentiful through Ford or any number of aftermarket suppliers. The Motorcraft part number is PW-464, or 5W7Z-8501-AA through any dealership. It also happens to be a reverse-rotation (counter-clockwise) pump and is considered the "short" version - 65mm from engine block to the front of the pulley flange - which was a change in 2001.
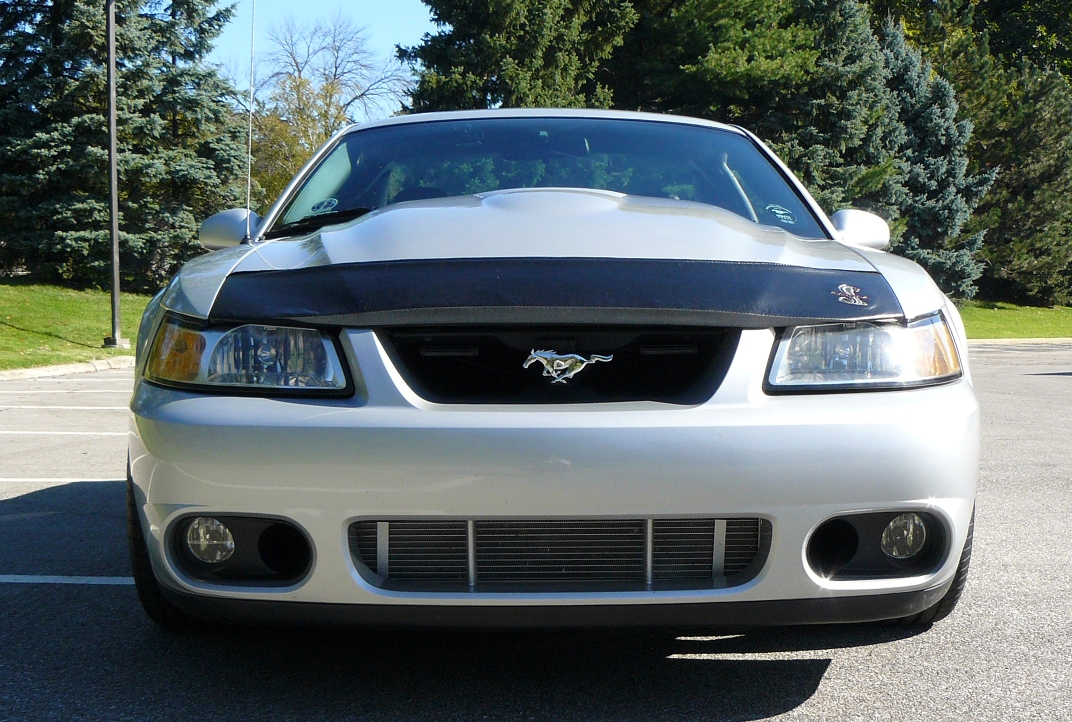
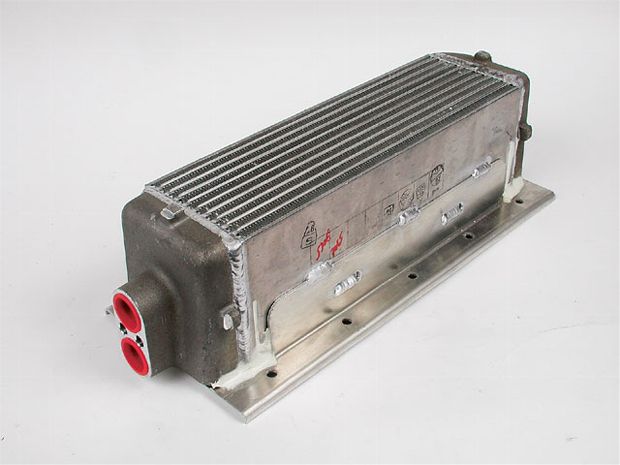
 Anyone
that looks at the front end of a Terminator probably notices the large opening
at the bottom of the bumper that differs from the previous models of the Cobra. It's not just another pretty face, but an effective
opening for the Garrett air-to-water heat exchanger, which also came about due to the
increased power levels of the Terminator. Although the
factory version actually wasn't all that bad, an upgrade to a larger unit is
always a good move, especially when boost levels are raised (just like a
radiator, more surface area is key). To keep the
terminology straight, this is not to be confused with the
"intercooler",
which is the small radiator mounted directly
beneath the supercharger in the lower intake manifold, and shown in the next
section. Oddly enough, the Ford parts system still refers to both as
intercoolers, but keeping them separate in the aftermarket minimizes confusion -
usually.
Anyone
that looks at the front end of a Terminator probably notices the large opening
at the bottom of the bumper that differs from the previous models of the Cobra. It's not just another pretty face, but an effective
opening for the Garrett air-to-water heat exchanger, which also came about due to the
increased power levels of the Terminator. Although the
factory version actually wasn't all that bad, an upgrade to a larger unit is
always a good move, especially when boost levels are raised (just like a
radiator, more surface area is key). To keep the
terminology straight, this is not to be confused with the
"intercooler",
which is the small radiator mounted directly
beneath the supercharger in the lower intake manifold, and shown in the next
section. Oddly enough, the Ford parts system still refers to both as
intercoolers, but keeping them separate in the aftermarket minimizes confusion -
usually.
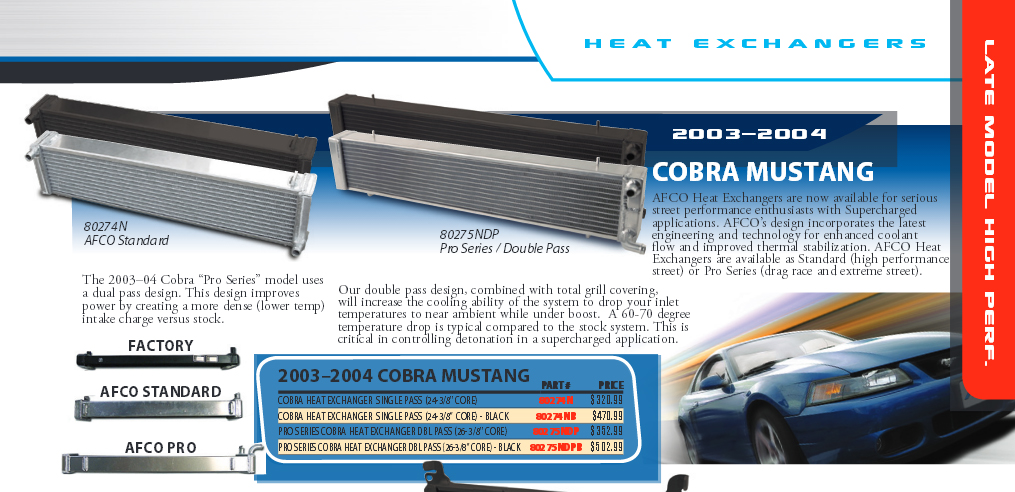
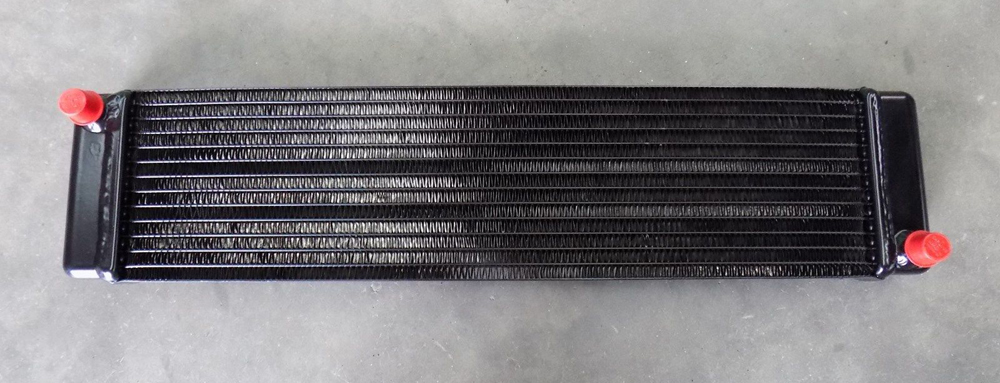
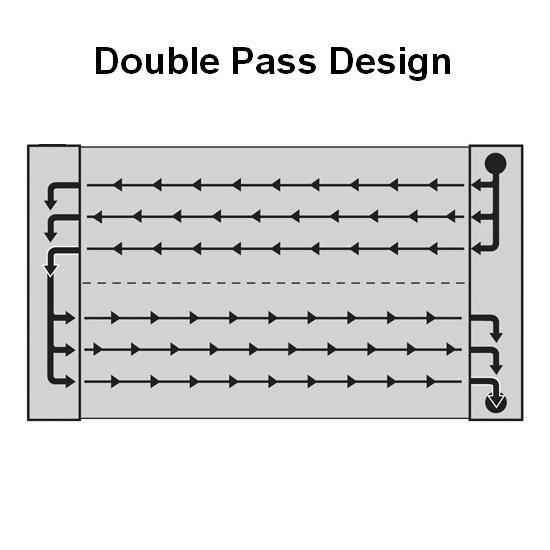
My choice was the Afco Racing 80275NDP that not only looks great, it allows for approximately 50% more coolant on that side of the system (factory fill is just under 1 gallon). It is also set up in a "Double pass" configuration, which allows for more thermal transfer and greater cooling since the fluid is essentially run across it twice. Additionally, the factory hard lines, that retain a lot of heat, are replaced with rubber hoses that are not sitting in front of the radiator.
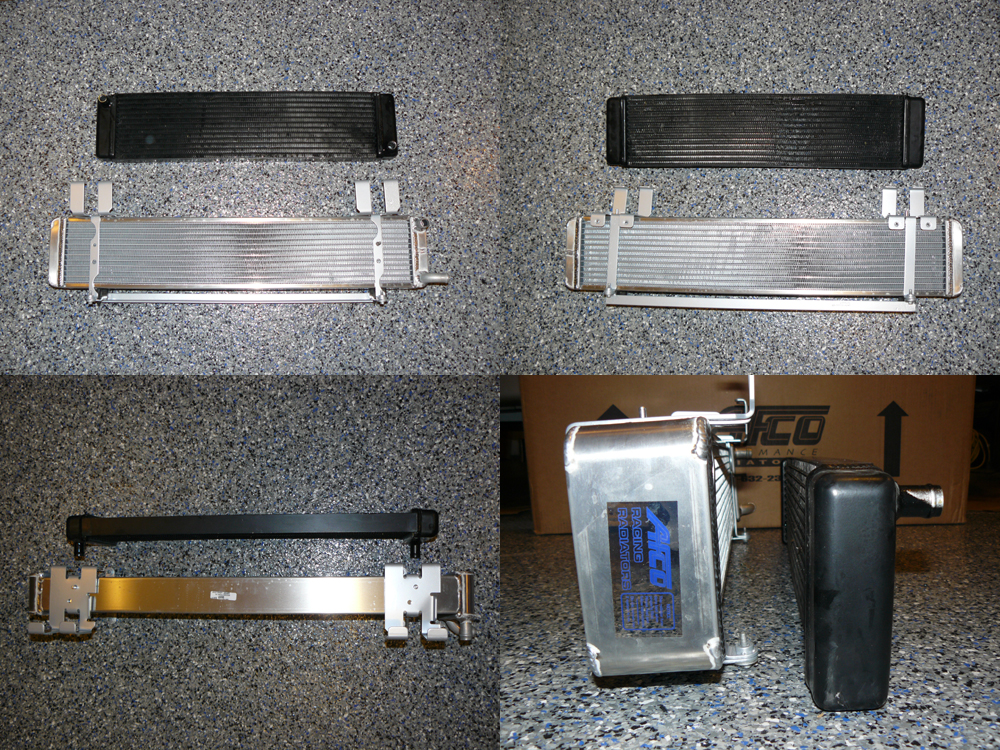
Afco sells the kit complete, making installation real easy, especially since the factory brackets are retained and no modifications are necessary. My own installation took about an hour, and although there was some maneuvering involved, the bumper did not have to come off, which is nice. The composite below shows several views of both the Ford/Garrett heat exchanger along with the Afco version - quite the difference! Being on the meticulous side, I decided to have the factory brackets powder coated in a matching silver, which gives the front end a very stealthy look.
If you don't happen to be a fan of Afco products for whatever reason, there is at least one other alternative from Fluidyne. Although it is a "single-pass" model, it also offers an increase in coolant capacity and retains the stock brackets. This model does require an extension of one of the hoses as well as a power steering bracket modification, but installation is still on the easy side (and apparently much less involved than their radiator!). Some also have great luck adding fans to their heat exchanger, but unless you are a hard-core drag racer, it's probably not a necessity for mostly street-driven cars.
To date, my new heat exchanger has performed flawlessly. I had at one point intended to gather some data when it came to the supercharger intake temperatures, but somehow that escaped me and I never got a before-and-after comparison. No matter, I can tell by the barely lukewarm coolant in the reservoir that there is not a lot of heat there, a sign that these really do work. No matter which unit you choose, you aren't going to go wrong!
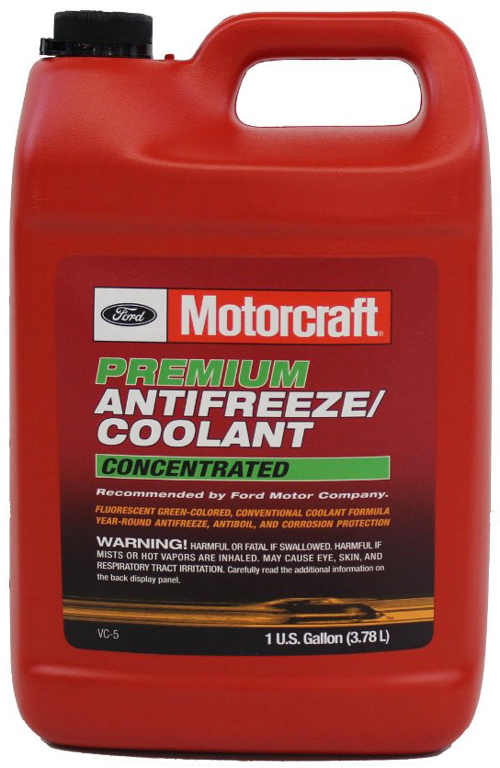
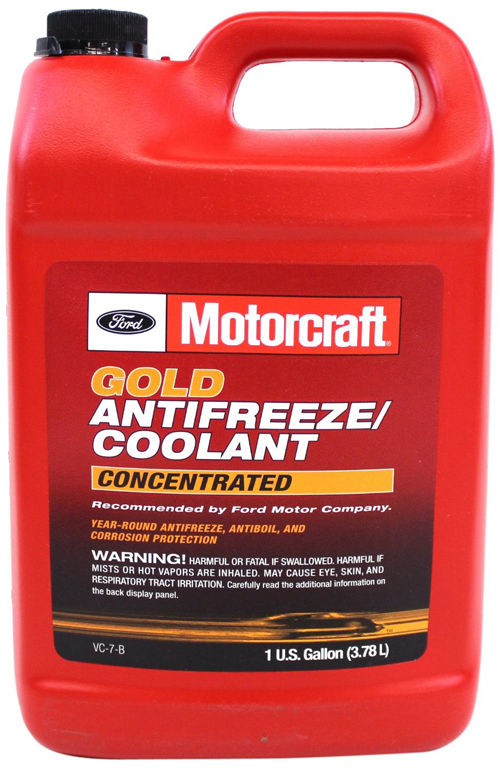
Note: The supercharger uses the same coolant as what is in your engine, but the systems are completely separate. Despite what you may read on various forums, there is no magical "supercharger fluid" - it is just standard engine coolant. There were, however, different versions that were in the Terminator: green VC-5 (formerly VC-4) in early builds through July, 2002, and gold VC-7 after. I always get a laugh when I see questions pertaining to this, but it's easy enough to figure it out by just reading the SVT Supplement (also found on my SVT Documents page).
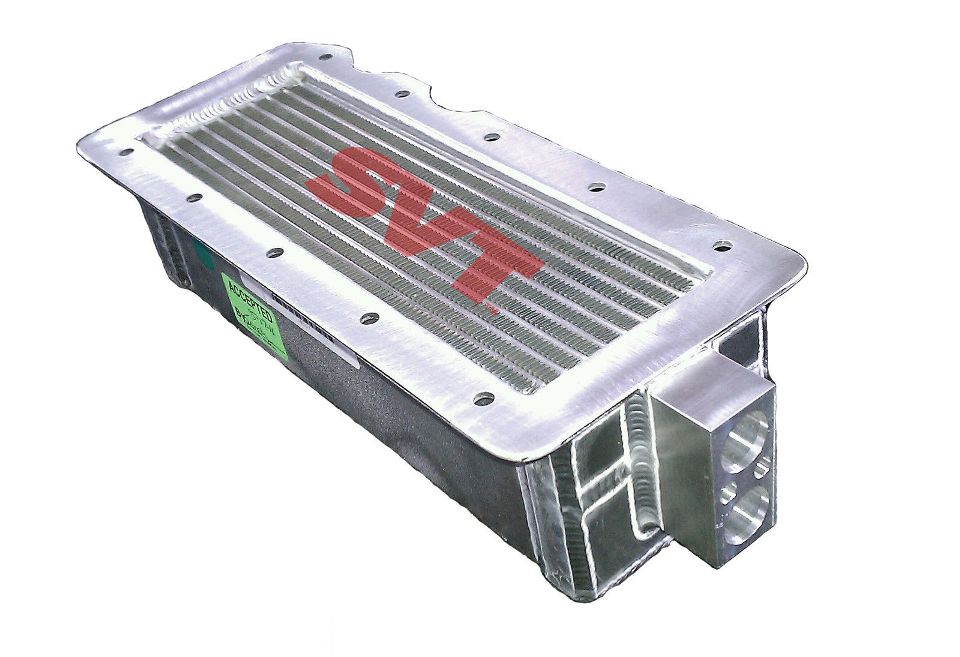
 As
already mentioned, the air-to-water intercooler is mounted beneath the
supercharger, and serves to reduce the charge air temperature by way of its
separate cooling system. The factory unit, formerly 2R3Z-6K775-BA (like the heat
exchanger, also made by Garrett) is yet another part for the Terminator that is
gone. While there are some that can be found on the used market, an OE version - that once was over $800 - is no longer
available. Fortunately, they are known to last unless you run an inadequate mix
of coolant and crack the core due to freezing temperatures, or are unlucky
enough that it begins to leak due to age. Also, if the
sealant between the mounting plate and intercooler body deteriorates, hotter
intake air will end up leaking around the cooling fins, which could lead to increased intake
temperatures. At that point, you'll definitely want it repaired or replaced.
As
already mentioned, the air-to-water intercooler is mounted beneath the
supercharger, and serves to reduce the charge air temperature by way of its
separate cooling system. The factory unit, formerly 2R3Z-6K775-BA (like the heat
exchanger, also made by Garrett) is yet another part for the Terminator that is
gone. While there are some that can be found on the used market, an OE version - that once was over $800 - is no longer
available. Fortunately, they are known to last unless you run an inadequate mix
of coolant and crack the core due to freezing temperatures, or are unlucky
enough that it begins to leak due to age. Also, if the
sealant between the mounting plate and intercooler body deteriorates, hotter
intake air will end up leaking around the cooling fins, which could lead to increased intake
temperatures. At that point, you'll definitely want it repaired or replaced.
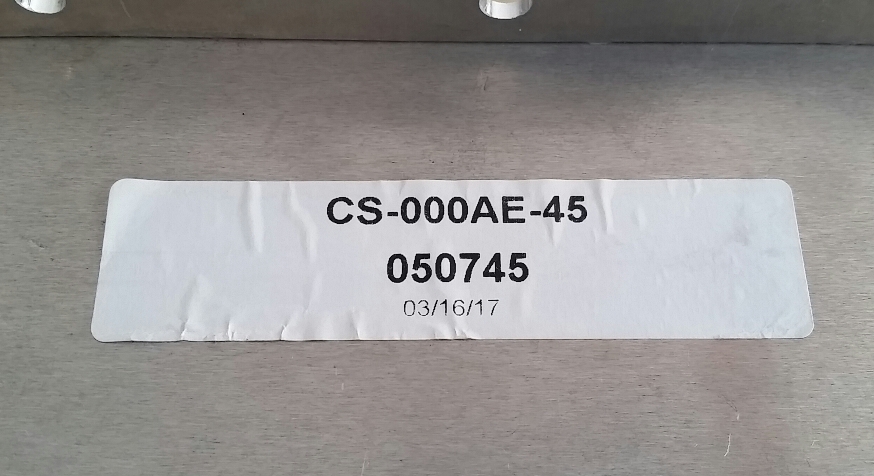
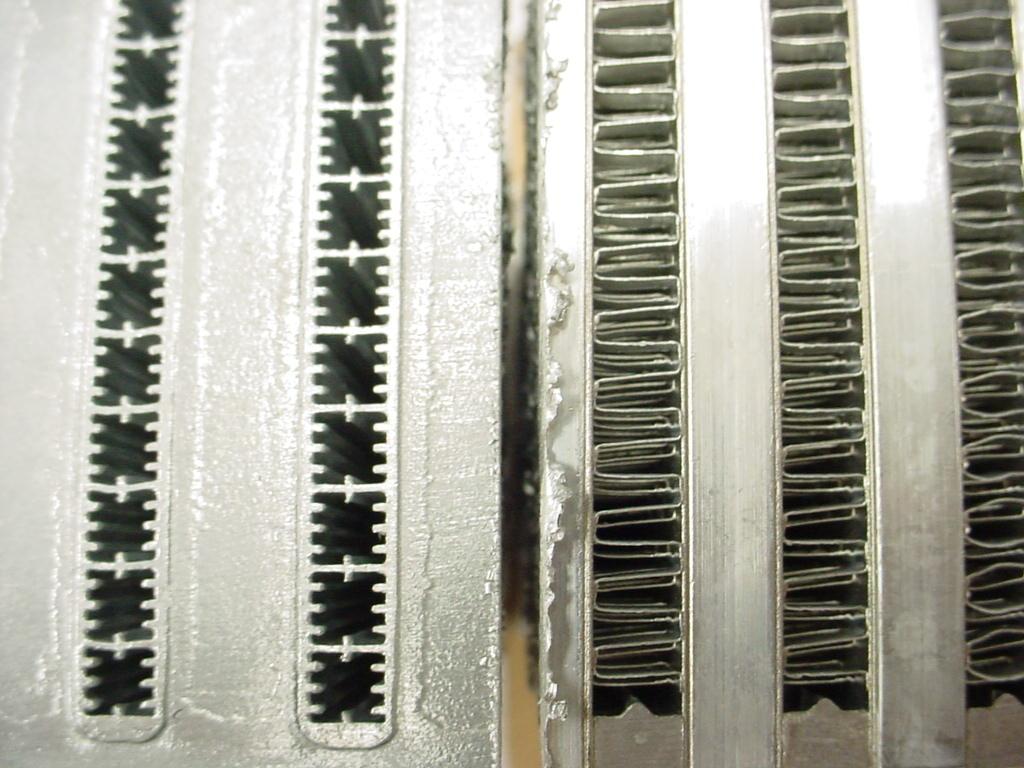
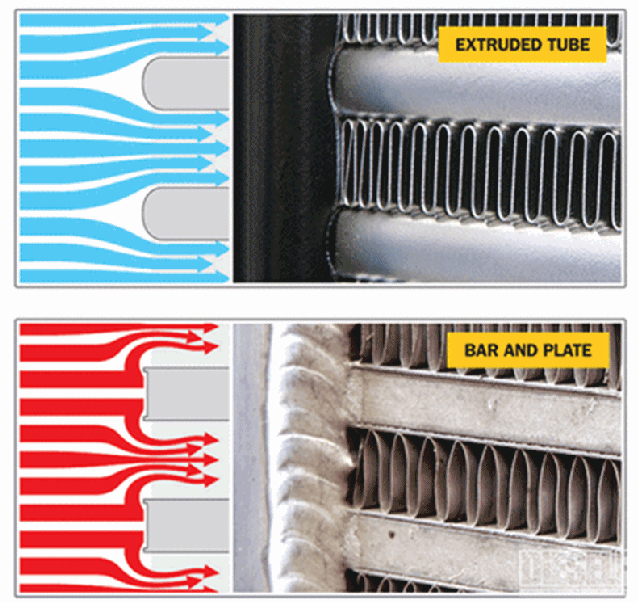
Like the radiator and heat exchanger, there is an aftermarket version available. This one is made by Griffin and sold by Lightning Force Performance as their AE-45, which lists for around $650, give or take (the Griffin part number was originally CS-000AE-45, just as an FYI). These models are actually a bit more compact, being shorter and wider by about 1/2", and come in at just over 6 pounds (compared to the Garrett's 7.5), for what it's worth. Additionally, they are a ten-row design in contrast to the Garrett nine-row, and have cores that differ slightly: "bar-and-plate" in the Garrett and "extruded tube" for Griffin. More on that in a moment.
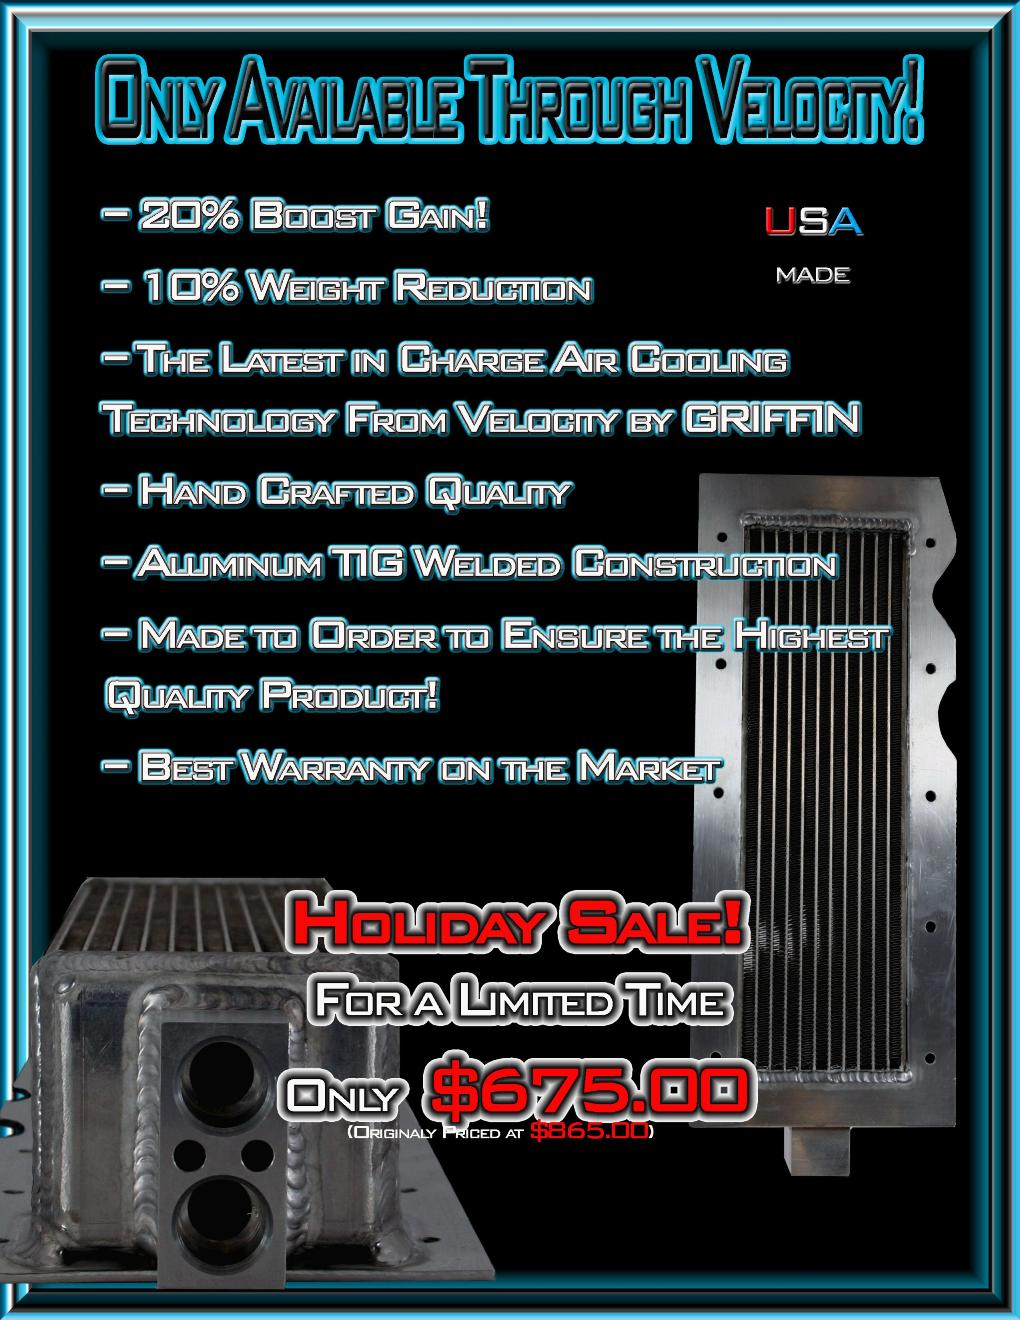
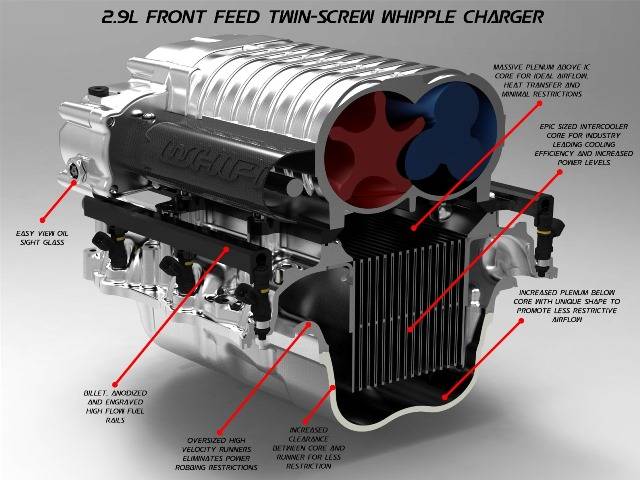
Interestingly enough, these intercoolers were originally marketed by the former Velocity Turbo Systems beginning in late 2008, which were accompanied by two ads showing the exploded drawing in one and the reported benefits in the other. While they may not actually offer an enormous cooling advantage over the factory unit, a reputable tuner had found the inlet temperatures were reduced by approximately 10°F, and every little bit definitely helps. Adding to that, they really are an improvement over the original...
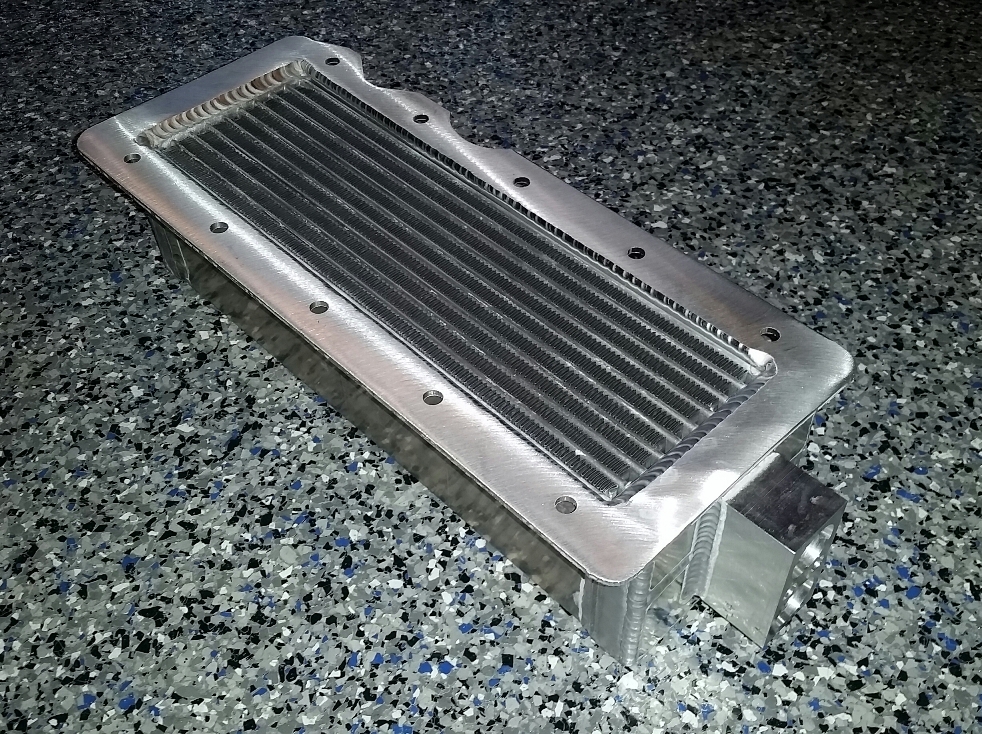
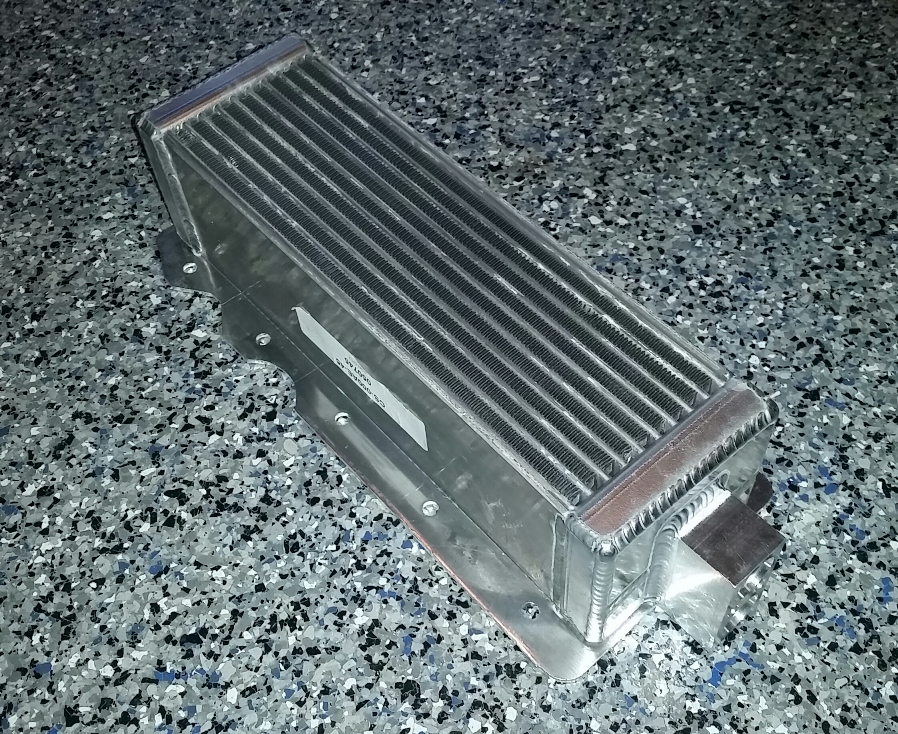
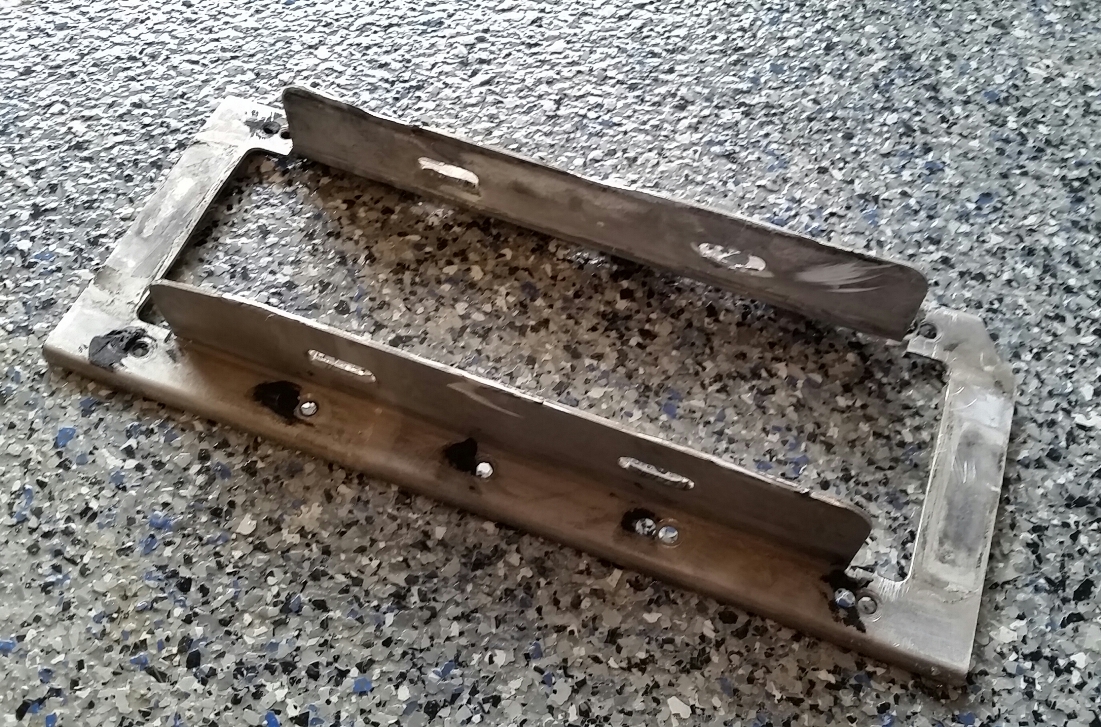
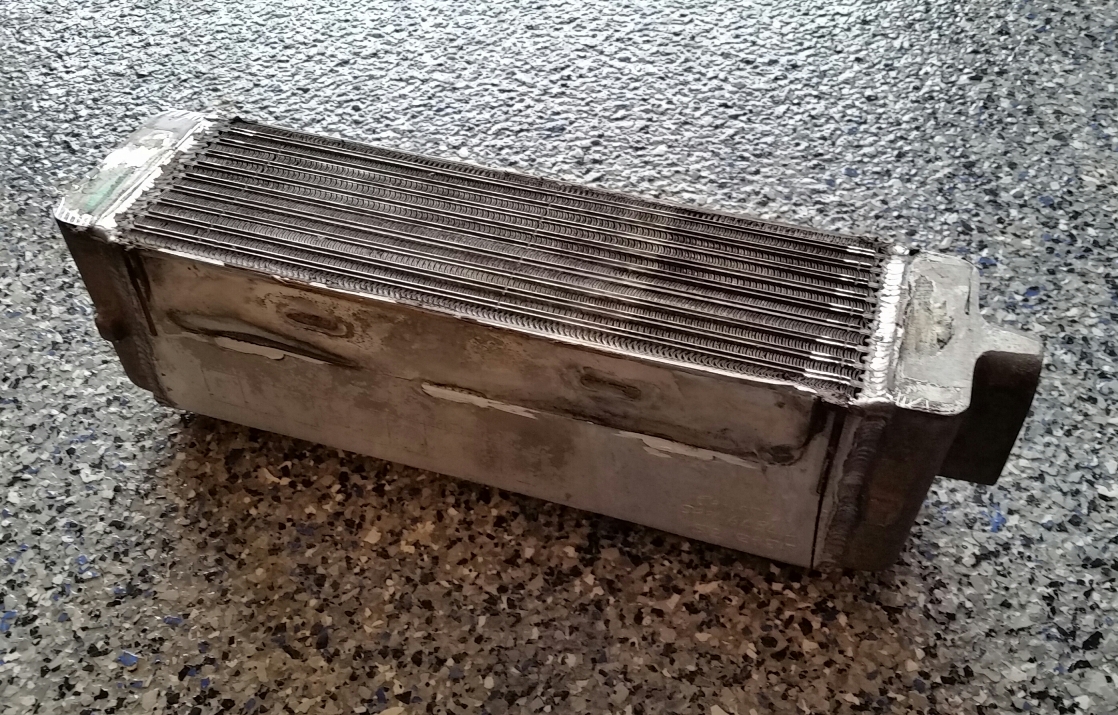
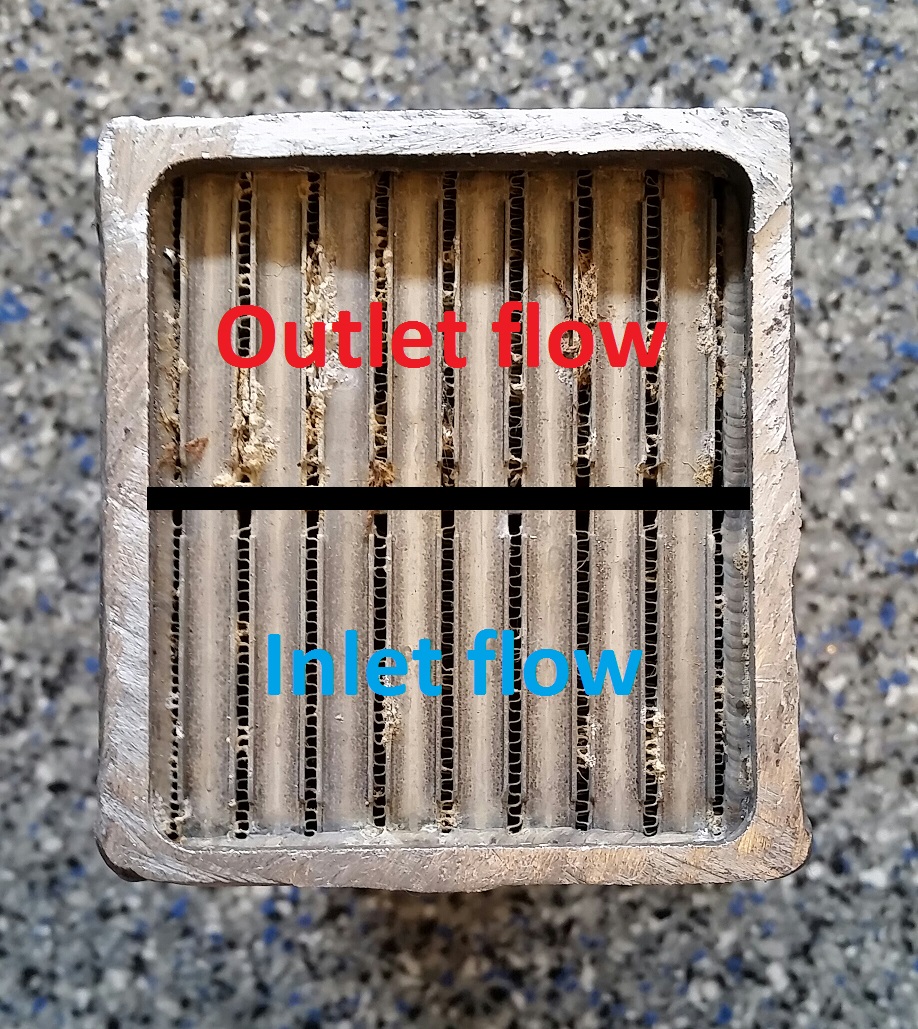
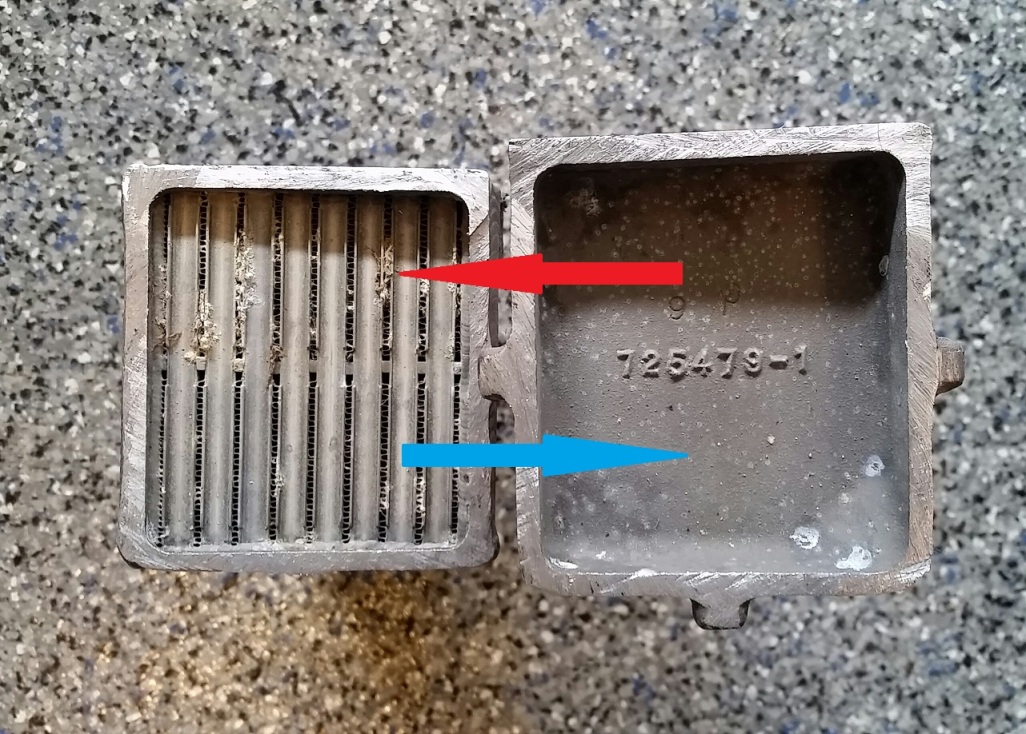
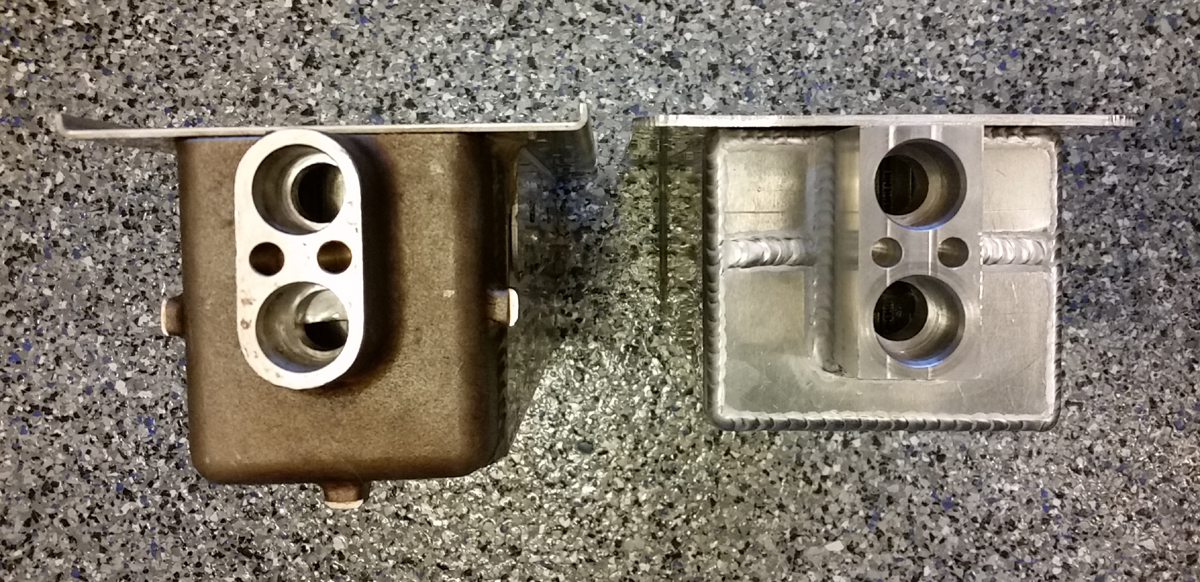
On the quest for continually expanding knowledge, I was fortunate enough to acquire a leaky factory intercooler that was donated by Team-VMP racer Rick Kaknes, and it went under the knife to see what was inside (thanks, Rick!). As already mentioned, they have an add-on sealant around their upper rim which is due to the mounting plate being a separate part that is set on the intercooler body from the top, which came off first. Overall, they are fairly simple: the coolant flows in through its lower half towards the rear, then is pushed upward and out the top half back to the tank in front. The pictures below show from L-to-R, a cross-section of the core, the rear cap with core, and a comparison of the front and rear caps (minus the core, obviously). Again, the coolant flows in along the lower half and then out through the upper half. It's also worth pointing out that the inlet appears to be slightly restricted, which is due to not only the position of the flow tubes on the outside of the intake manifold, but the placement of the dividing plate inside the front cap.
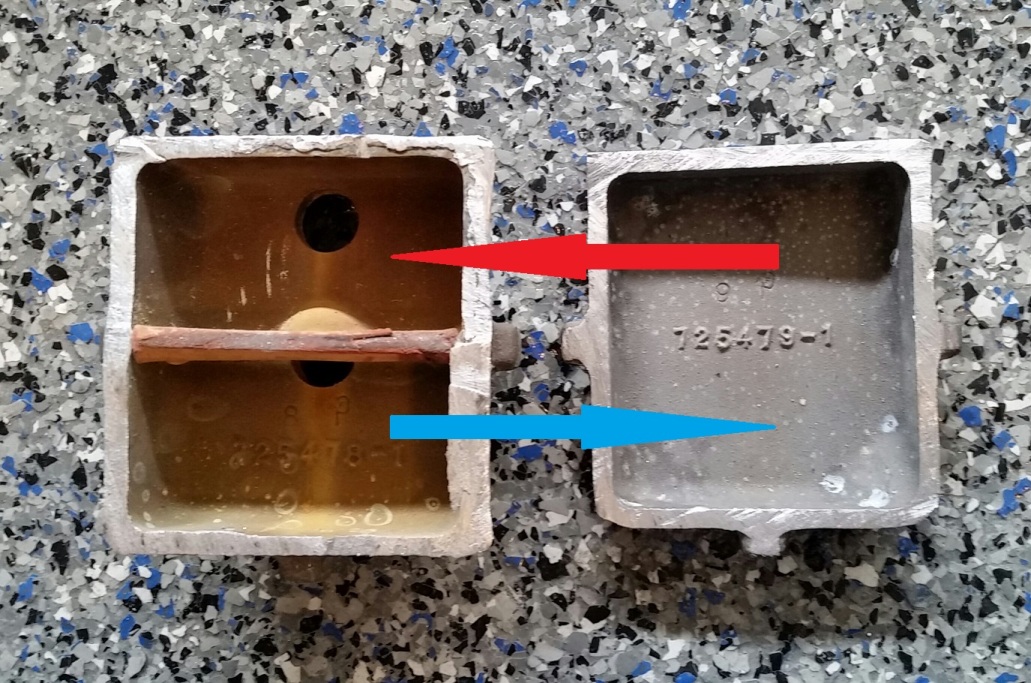
With all that in mind, the Griffin version is definitely a step up. When comparing the previously mentioned extruded tube cores to the leak-prone bar-and-plate design, the single-piece extruded tubes are not only lighter, but offer better heat transfer with their incorporated "micro-fins" (along with the extra row in this case). Next, the extruded tubes allow for the charge air to flow smoother since they are rounded off - somewhat minor, but another plus. Also, with the Griffin core it appears that the inlet side, while being slightly less restrictive, is also a bit larger which places a higher ratio of the cooler fluid inside the body. Although I can't be absolutely certain of that, a front view shows the lower section of the end cap appearing to be larger, which can be interpolated to match the core section behind it. Finally, with the full-length weld along the top plate, there won't be any leaks since there is no sealant to rot away.
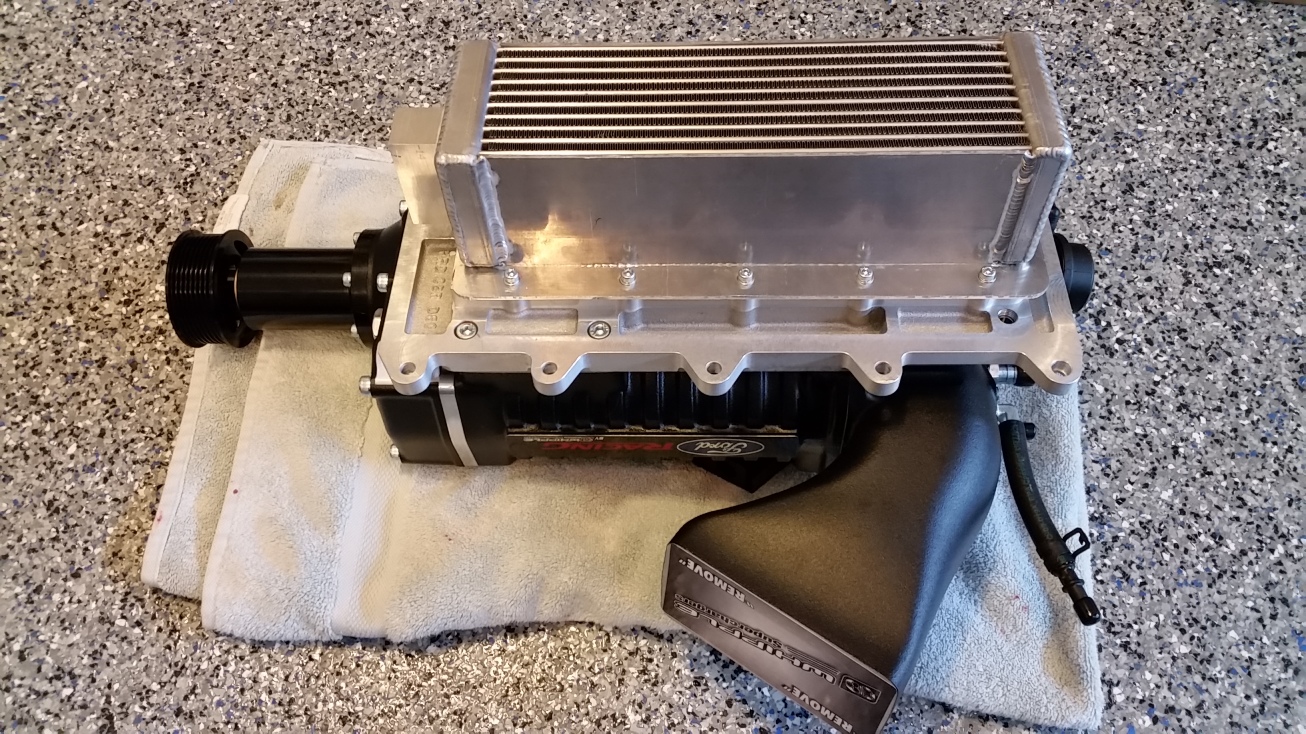
If you need another, and don't want to bother with used parts, this is a viable option, especially due to the dwindling supply of the original out there. With my new Whipple installed (see my Engine page), it was accompanied by this intercooler, especially since it was acquired at yet another fantastic deal. Actually, it cost nothing, but that is another story. Speaking of Whipple, I'll also add that the intercoolers they make for their S550 kits also take up less space underneath, "...to promote less restrictive airflow" - yet another potential bonus of this one. While I'm not necessarily expecting massive gains over the stock version, I'll be glad to make use of the new technology.
Now that some nice weather has made an appearance in 2018, I was glad to get behind the wheel to check out the inlet temp's, among other things. So far, the Griffin unit seems to work just fine, although having a more efficient supercharger above it makes a difference as well. With outside temperatures around 80°, I was pleased to see the IAT2 level never really creeping up beyond the low 120's, even with getting a bit aggressive (again, I don't drag race, so your results may be different). Once I backed off in to some mild cruising, the value was fairly steady at just above 110° as the engine coolant drifted back in to the 170's (more on that at the bottom of this page). You just can't expect miracles, given the location of the intercooler, but I'm glad to know there is a good alternative out there!
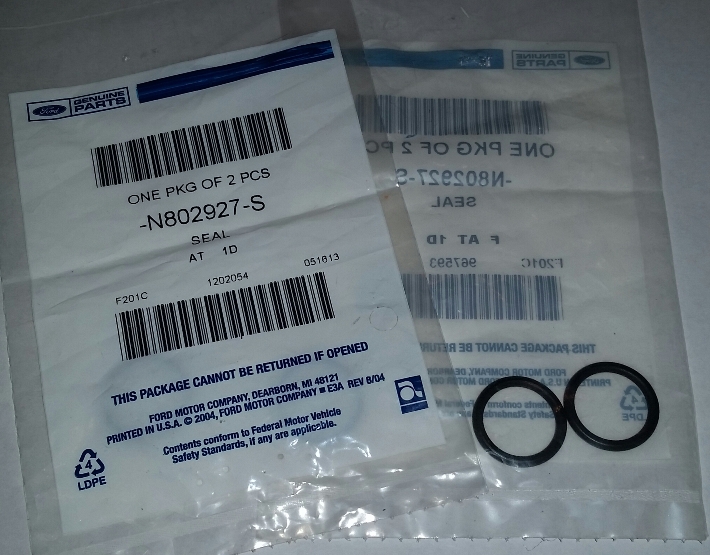
Note: Whenever your intercooler is out, it's always a good idea to replace the o-rings on the flow tubes that are mounted in its front ports. Four of the rings are required, and can be purchased through Ford as N802927-S. They come in packs of two, but are still easy to find and not expensive. If you also need the gasket that sandwiches the mounting block and flow tubes, that part number is 2R3Z-9L438-BA or is available through FelPro as 73051.
 I
briefly mentioned the Terminator's unique oil-to-water
oil cooler at the top of the page, so it
is definitely worth having a section with more details. This version was a
change for the 2003 model that allowed for more coolant flow, and generally is
considered a part that has worked real well for most of us. Unfortunately with
age, the biggest issue that can arise is a leak, both in terms of oil and
coolant. If you surmised
that just about every component of them is obsolete from Ford, you would be
correct.
I
briefly mentioned the Terminator's unique oil-to-water
oil cooler at the top of the page, so it
is definitely worth having a section with more details. This version was a
change for the 2003 model that allowed for more coolant flow, and generally is
considered a part that has worked real well for most of us. Unfortunately with
age, the biggest issue that can arise is a leak, both in terms of oil and
coolant. If you surmised
that just about every component of them is obsolete from Ford, you would be
correct.
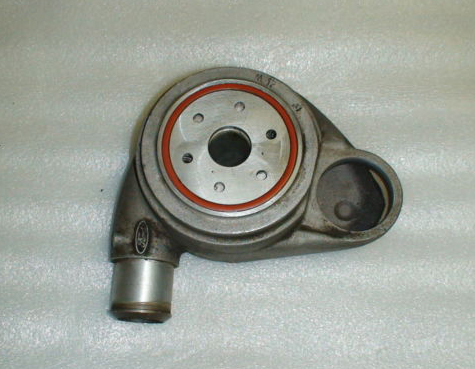
Before going on too much, however, I'll add that the assembly actually consists of two basic parts: the block adapter (including gasket), as well as the cooler body (with mounting shaft). The thumbnail contains a Ford diagram of the components with their part numbers for reference, but if you need any part of it serviced, you'll have to rely on the aftermarket. On a good note, there are options to keep them functioning, short of physical damage to the housing itself.
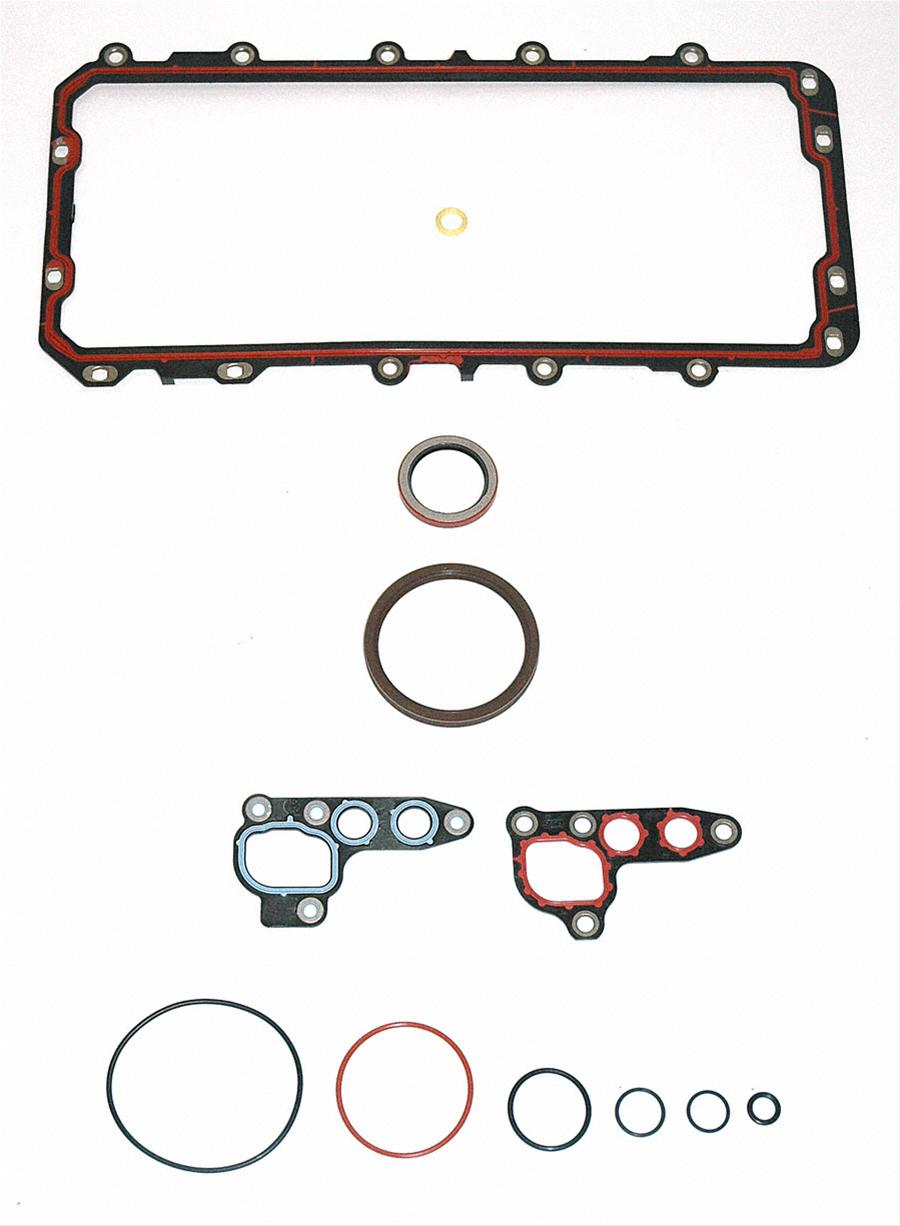
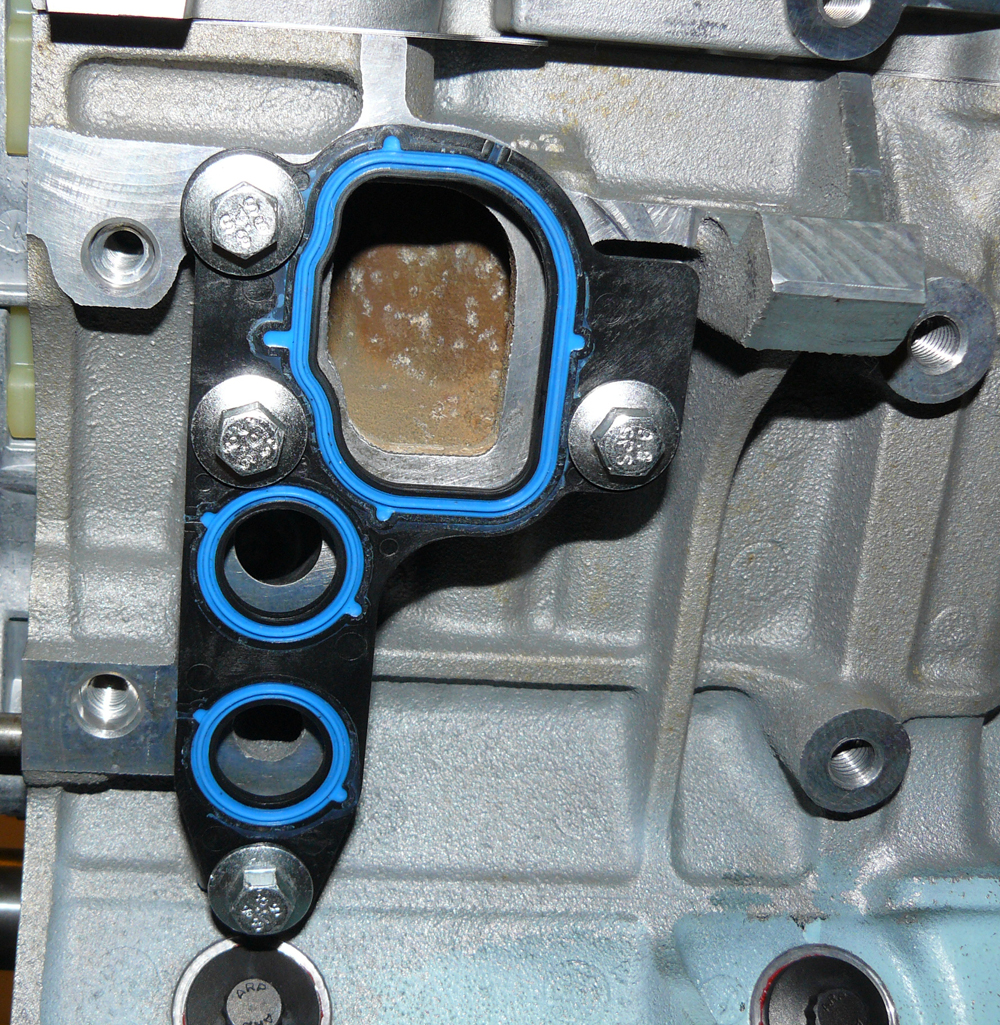
If you are rebuilding an engine or doing any service on the lower end, the Fel-Pro "Crank Set", CS97904 will contain most of what is necessary to re-install the cooler for trouble-free service. One of the first hurdles is to know which block-to-adapter gasket is the correct one in order to prevent a coolant leak. Traditionally, there had been an orange "short-passage" version for blocks used from 1996 to 2004 (iron and aluminum) as well as a blue "tall-passage" version for the aluminum blocks starting in 2005. The colors of them have actually varied, so the safest way to check is to simply place it on the block, like mine shown on the Aluminator below (see my Castings page for more on the blocks). For an easy comparison, placing them side-by-side makes the differences stand right out. Since the gasket is obsolete from Ford, not to worry, the original orange from Fel-Pro is 70415, and the blue is 70801. Again, pay no attention to color now, even though Fel-Pro shows them that way as they were first introduced.

From here, mounting it is simple using the four bolts on the adapter. This is followed by the body and center shaft which requires a 12mm Allen bit - and about 50 ft/lbs of torque per the service manual (it's a good idea to check at every oil change!). If yours does not leak, it's a cinch, but never fear, there are two kits out there that will save the day if it has to be re-built - which is the common fix. When needing only the required o-rings, hit up Delk Performance in Lebanon, TN. They sell the complete kit for around $35, and if you mention to Matt that you saw it listed here, he'll even give you a nicer deal! They include a diagram to let you know which rings go where, so it doesn't get any easier. For the eBay fans, look them up as "cmdelk" since they do list it there as well. Thanks, Matt, for making these easy to track down!
Another option was from Speed Concepts out in southern California. One of their two kits comes with not only the block gasket, but the mounting shaft o-ring and even the hex bit. They also include the oil cooler face o-ring, along with the one for the water outlet, which is shown above. If you need to pry out the center section from the cooler body, those o-rings are part of their "Extended Service" rebuild kit that can be added to the order. From what I have been told, they also will send along a nice set of instructions to walk you through the process.
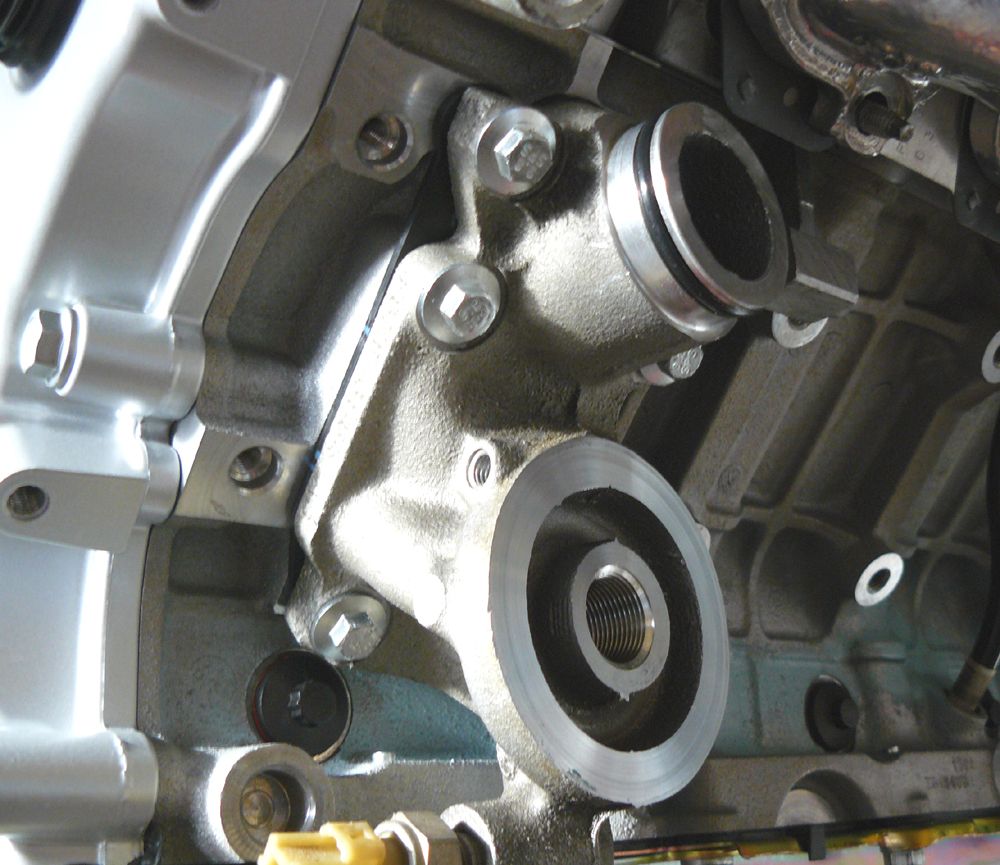
I've been fortunate that my low-mile oil cooler was in pristine condition and mated up to the new block trouble-free (shown above). Nonetheless, I decided it was a good idea to have one of the kits on hand just in case - thanks again to Matt and his crew at Delk! If you are in a pinch here and find coolant or oil on your driveway, not to worry since it's just a matter of applying some basic mechanical skills to get back on the road.
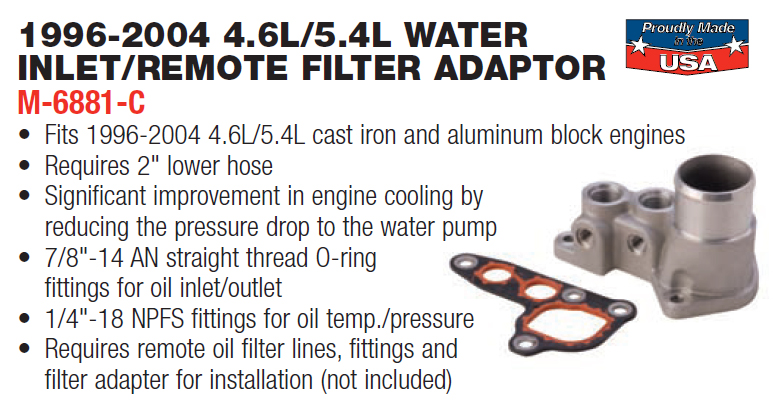
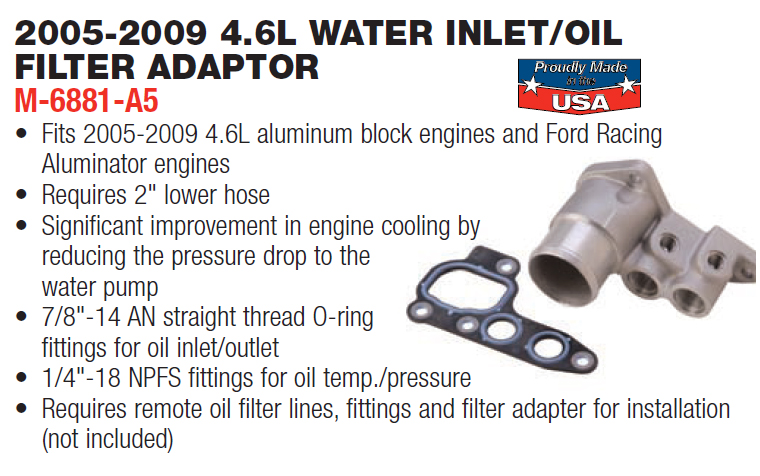
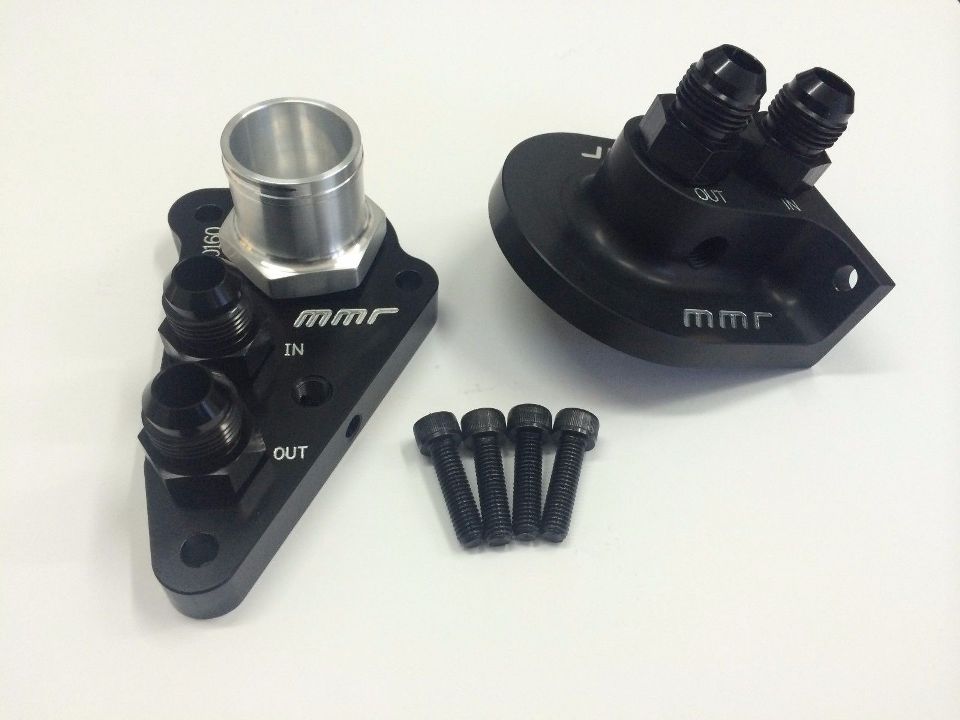
Note: While most of us have been fine keeping the stock components, some have removed them in favor of remote mount kits depending on the application. Ford Racing actually used to sell the adapter (minus the oil cooler lines), which included the gasket. The '04 and earlier kits fit the iron and aluminum blocks and were listed under M-6881-C. For the '05-up Aluminator blocks, it was M-6881-A5. Those kits are, of course, obsolete, but a billet adapter can be acquired through MMR or possibly other sources if necessary. If you hate your oil cooler, or just want the oil filter remotely mounted for whatever reason, there is always a solution!
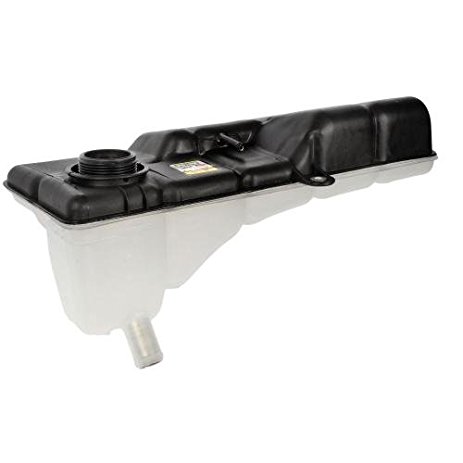
I'm been perfectly accepting of the OEM expansion tanks: after all, function before form. Granted, they don't win awards for their looks, but they do what they need to do, and since the coolant is always visible, I'm fine with it. There has just never been a desire here to load up my engine compartment with some overly large, heat-soaking metal tanks, even if they do hold more liquid. So far, so good.
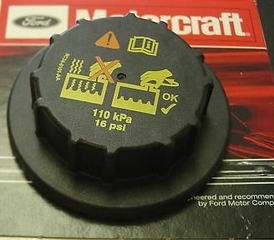
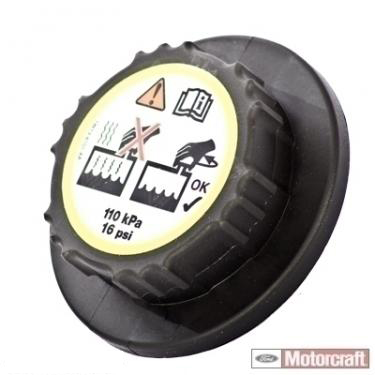
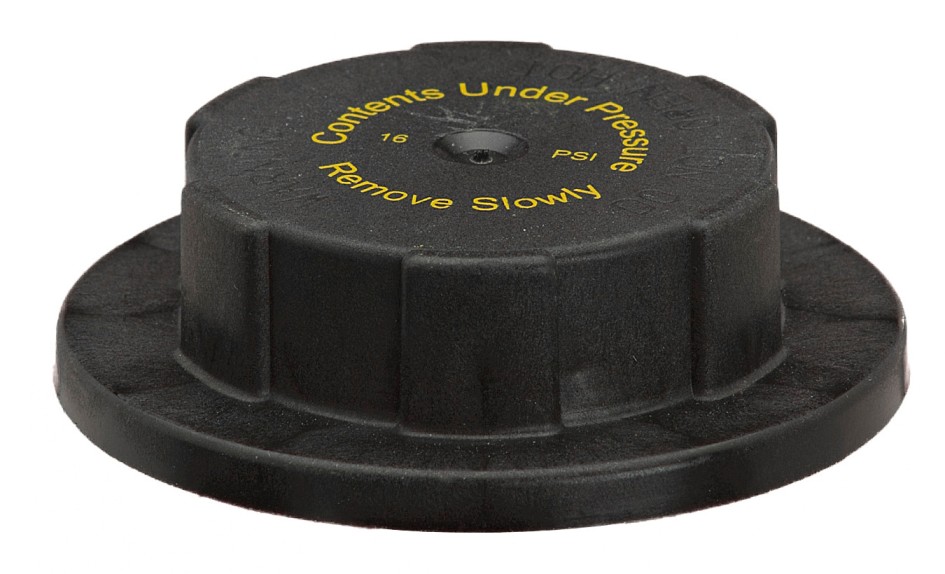
That all being said, the OEM tanks are not too difficult to find after all these years. The radiator overflow is still available through Ford as 3R3Z-8A080-AC, at a retail price of just over $100 and obviously cheaper on the internet (it is the same for all 4.6's from 2001 - 2004 despite what information is out there on the internet). You can also find an aftermarket version through Dorman under their part number 603-134 which is also inexpensive. The 16PSI cap for it is around, too, and available as the Motorcraft RS-527 or under the Ford number of 9C3Z-8101-B (formerly Motorcraft RS-103 or F6DZ-8100-A). The new version lacks the adhesive label of the original, so apparently someone decided it was easier - and probably cheaper - to make it as one piece with some embossing. As an alternative, Stant makes one under their part number 10238.
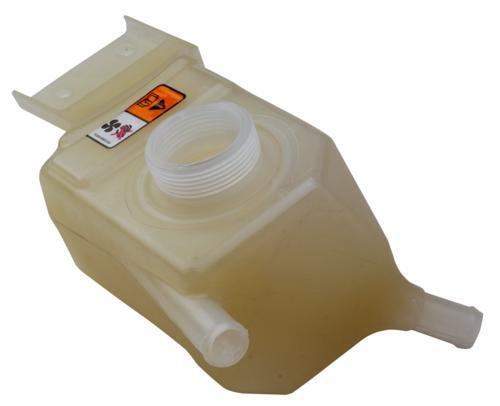 On
to the unique supercharger coolant reservoir, there are actually some of these still
out there as well. The part number is 3R3Z-8A080-AB, or if you happen to locate
a Ford Racing dealer that has a few stashed away, they were once M-8080-AA. Also, check out Dorman again, 603-368
- an unlikely source for an OE-like version. As for the
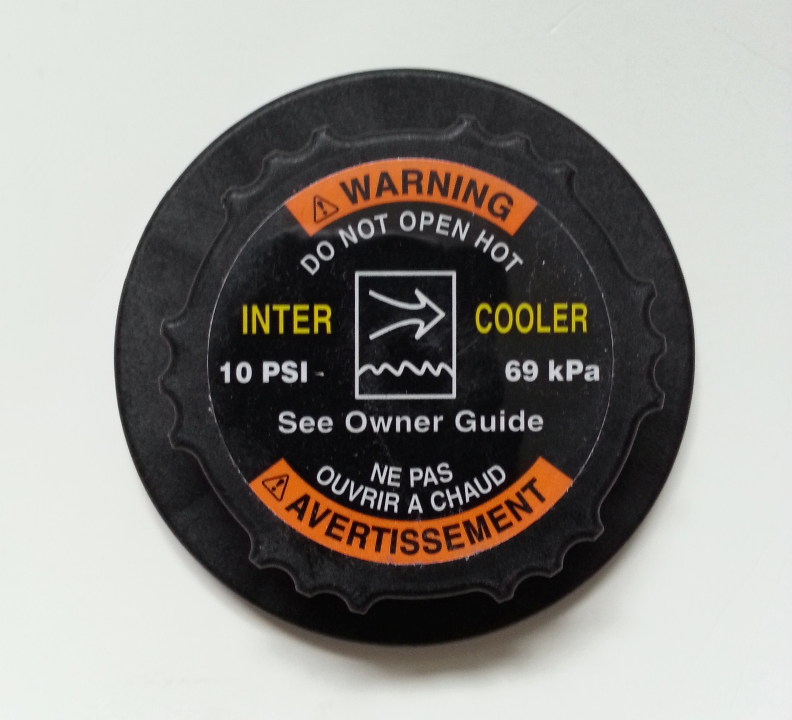
original 10PSI cap, Motorcraft RS-517
(Ford XL3Z-8100-AA), they are impossible to find despite the tank being around. On a good
note, Ford decided the 16PSI cap used on the main tank was perfectly acceptable
as a replacement, but it's generic and lacks the neat label with "INTER-COOLER" on
it. Bummer.
On
to the unique supercharger coolant reservoir, there are actually some of these still
out there as well. The part number is 3R3Z-8A080-AB, or if you happen to locate
a Ford Racing dealer that has a few stashed away, they were once M-8080-AA. Also, check out Dorman again, 603-368
- an unlikely source for an OE-like version. As for the
original 10PSI cap, Motorcraft RS-517
(Ford XL3Z-8100-AA), they are impossible to find despite the tank being around. On a good
note, Ford decided the 16PSI cap used on the main tank was perfectly acceptable
as a replacement, but it's generic and lacks the neat label with "INTER-COOLER" on
it. Bummer.
In any case, if you chose to toss the factory tanks, there are other options. The aftermarket tanks will probably do the job just fine if you dig the looks and their styling, and there are plenty out there, especially through places like Canton or Moroso. I think I'll be happy to keep the boring stock stuff here.
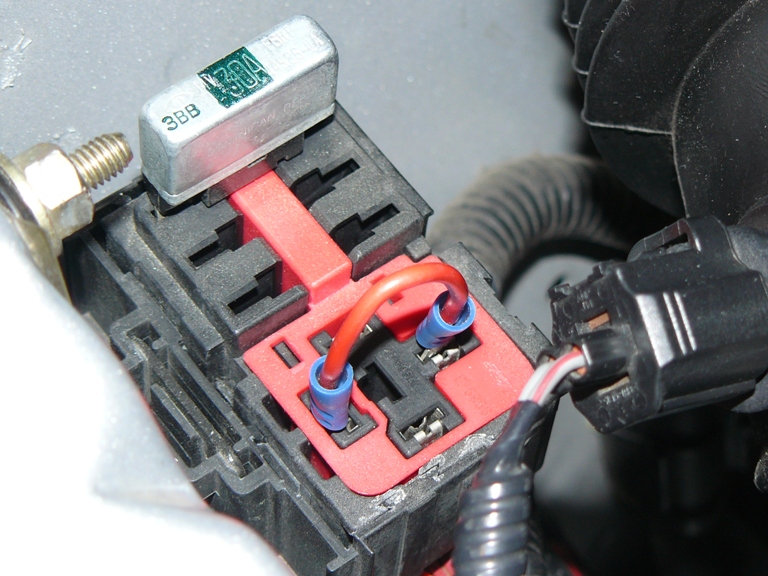
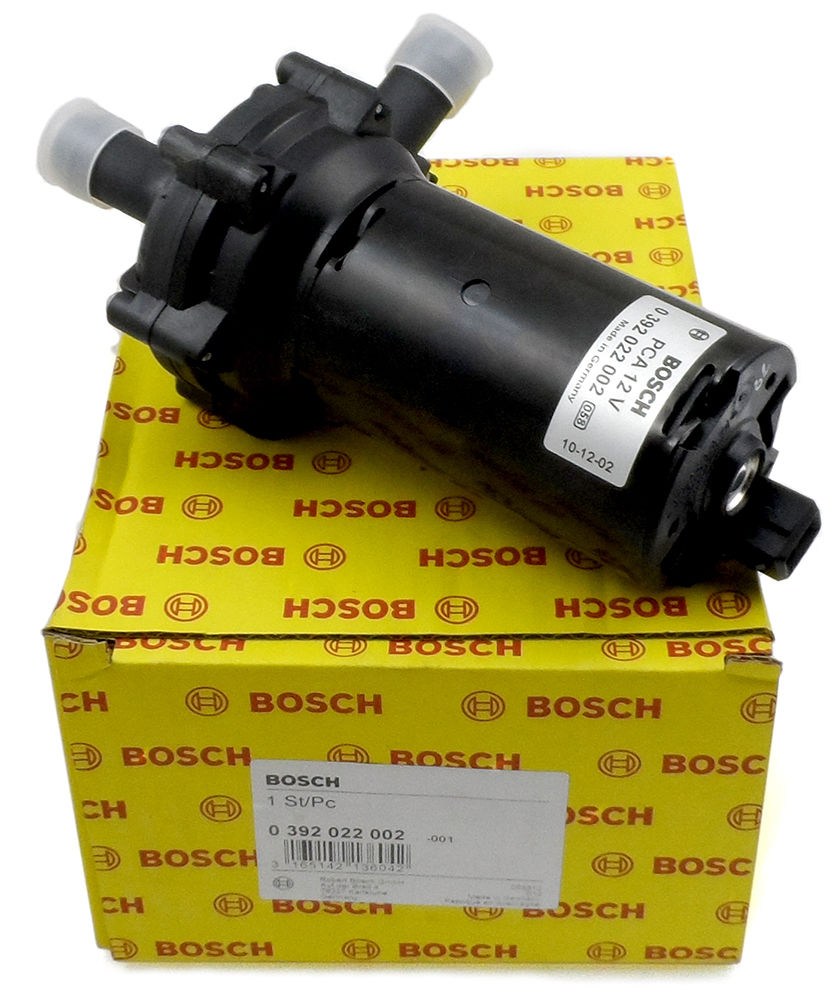
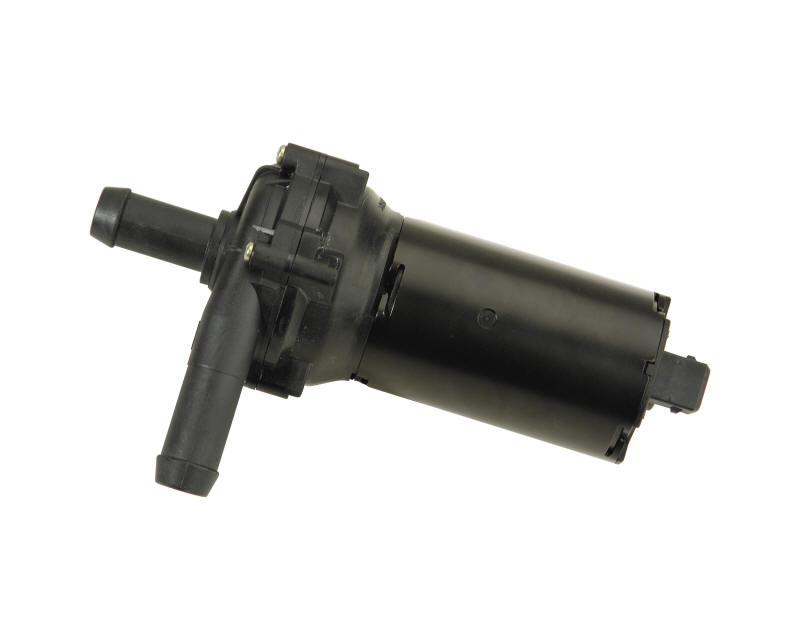
Note: If you ever have any doubts as to the operation of the coolant pump for the supercharger, it is very easy to see the fluid flowing once it turns on - one reason why I prefer to use the OEM "clear" tank. You can also verify pump operation with the engine off by making a jumper, and inserting it after you remove the relay (located in the box near the Mass Air Flow Sensor). This is also a great way to purge the system of air if you installed a new heat exchanger or had the supercharger out of the vehicle. As for the pump itself, the Ford part number is F8YZ-8501-AA, originally used on the Ranger pickup. They are also made by Bosch and sold as their 0392022002, and available through Ford Racing as M-8501-L54, courtesy of the Lightning truck program.
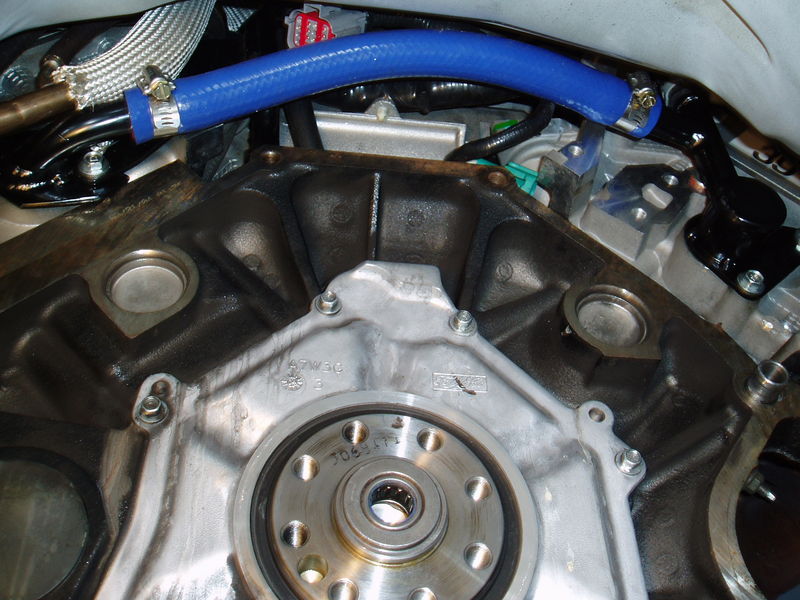
One of the gremlins that has plagued the occasional Terminator from early in their build history has been excessive heat in the vicinity of the pistons most rearward on the driver's side (#'s 7 & 8). The consensus is that the updates to the cylinder heads over the years were as a direct result of these cooling issues that in turn effected the valve seats, leading to a "tick" (for everything about the heads and blocks, see my Castings page). If you look at the coolant flow, it is fairly obvious that the passenger side allows for a path out of the back of that head through the heater core inlet, whereas on the driver's side, it stays inside the head casting and has to re-circulate forward.
 With
that in mind, kits began to pop up, commonly known as "Head Cooling Mods", or HCM's, that allowed the coolant to escape from the left head as a
method to allegedly combat the "hot spots". While I personally have not added one to my
own, I wanted to at least point out the options
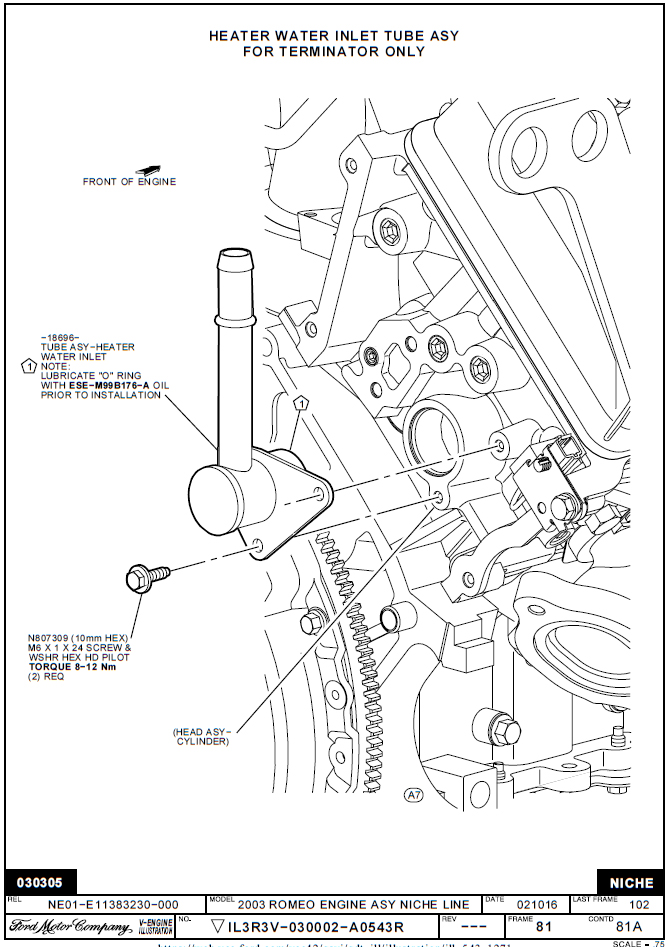
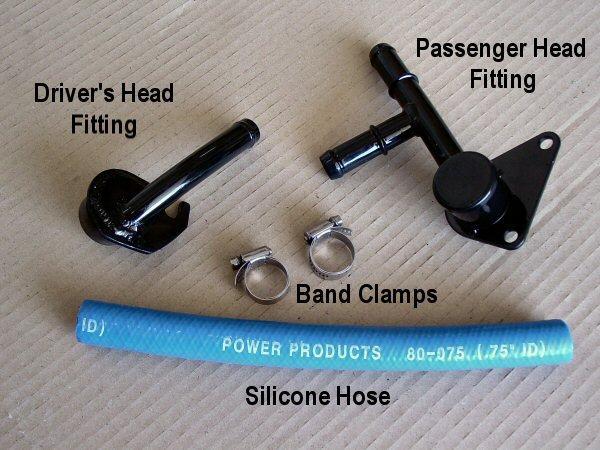
for general information. The earliest kit used a modified passenger-side
heater-core fitting added to the driver's side - both mounted on the
back of each head. This one was the "LDC
Chicago" kit, which was followed shortly after by one from a company
called Apten (which was more DIY). The downside here is that you have to remove
the transmission to access the back of the heads (the LDC version is shown in
the thumbnail), but it makes for a clean - and hidden - install. The kit is
supposedly still available through D'Agostino Racing, but I have heard that it isn't always easy to acquire, so
plan ahead!
With
that in mind, kits began to pop up, commonly known as "Head Cooling Mods", or HCM's, that allowed the coolant to escape from the left head as a
method to allegedly combat the "hot spots". While I personally have not added one to my
own, I wanted to at least point out the options
for general information. The earliest kit used a modified passenger-side
heater-core fitting added to the driver's side - both mounted on the
back of each head. This one was the "LDC
Chicago" kit, which was followed shortly after by one from a company
called Apten (which was more DIY). The downside here is that you have to remove
the transmission to access the back of the heads (the LDC version is shown in
the thumbnail), but it makes for a clean - and hidden - install. The kit is
supposedly still available through D'Agostino Racing, but I have heard that it isn't always easy to acquire, so
plan ahead!
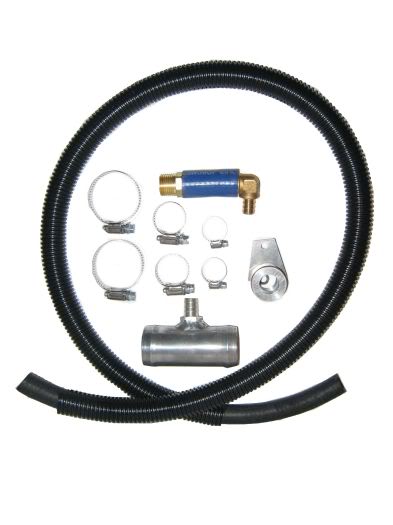
The next one was a bit simpler and used a custom fitting that was inserted in the rearward freeze plug on the top of the head, which was accessible behind the supercharger. Here, a hose was run up to a Tee that was sandwiched in to the upper coolant hose forward of the crossover. The earliest one of this variation was made by a company called EvenFlow, and although they are no longer around, it is still available from Lightning Force Performance for about $100.
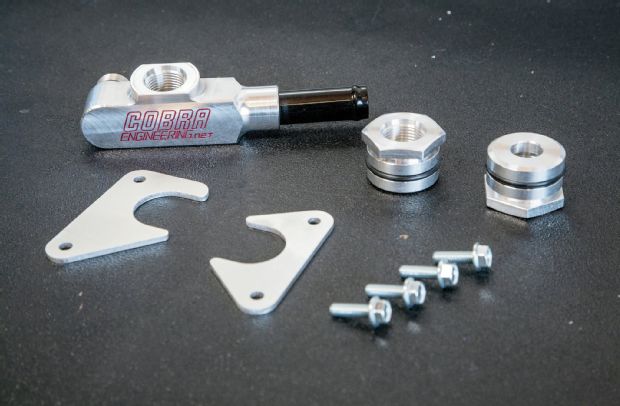 There
are also two more modern versions that are modeled after the original LDC kit, so not
to worry if you have to get your hands on one right away. The first is by
Cobra Engineering, located in Michigan's Upper
Peninsula. The shops owner, James Hellermann (known as "James Hell" on various
Mustang forums), dabbles in some other areas that require advanced machining and
really makes some nice stuff. He is also a great connection for the Stewart
water pumps since his shop is essentially right across the street from them. His HCM
was also featured in an article by
Motor Trend, so check it out if you want to
see it in action.
There
are also two more modern versions that are modeled after the original LDC kit, so not
to worry if you have to get your hands on one right away. The first is by
Cobra Engineering, located in Michigan's Upper
Peninsula. The shops owner, James Hellermann (known as "James Hell" on various
Mustang forums), dabbles in some other areas that require advanced machining and
really makes some nice stuff. He is also a great connection for the Stewart
water pumps since his shop is essentially right across the street from them. His HCM
was also featured in an article by
Motor Trend, so check it out if you want to
see it in action.
Another source is Modular Motorsports Racing, or MMR, of Camarillo, California. They make kits that can either be installed behind the heads, or on the top if you are lacking the motivation to pull the transmission. All of their products are all CNC machined and look to be of the highest quality. Overall, I've never seen any hard data to confirm the effectiveness of any of these HCM's, but it's easy enough to see that the diversion of the hot coolant could be of some benefit. No matter which one you choose, if it makes you feel better, then that is all that matters!
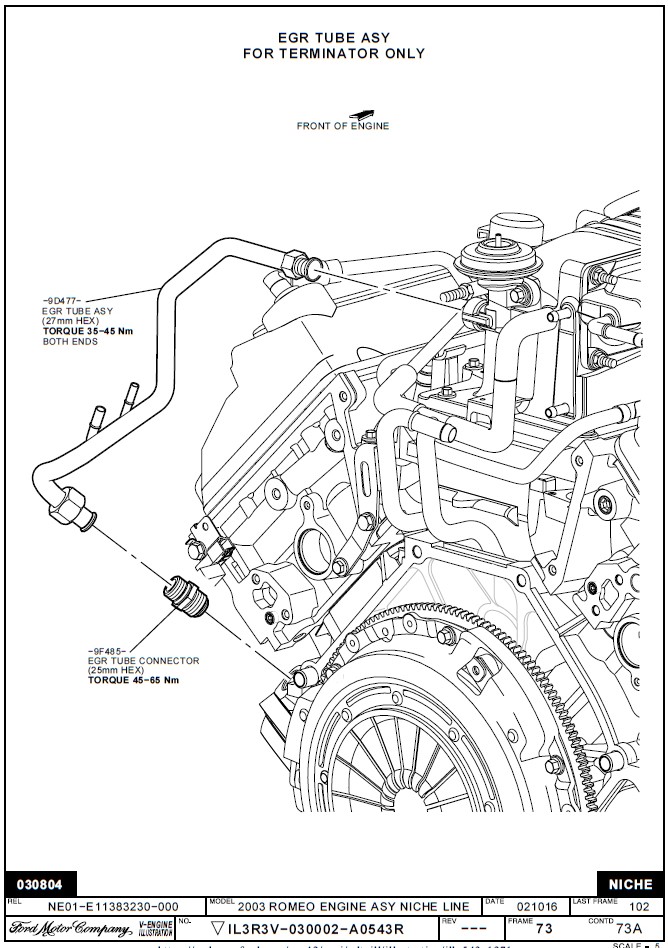
Note: Be advised that with the fittings mounted on the back of the head, you may end up having to remove the EGR tube: something to think about if you intend to keep the emissions gear. This was not the case with the original LDC and Apten kits, but the situation changed with the larger billet aluminum fittings. It's not an issue with the kits that fit in the upper section of the head, but if you feel the need to add one of them, it always pays to do your research.
 Many
modern cooling systems are different now than they were in the days of the
small-block pushrod V-8, for example, in that the thermostat is on the "cold"
side rather than the "hot" side. In simplest terms, this
means that the thermostat, when open, lets the "cooler" coolant in
from the radiator instead of letting the hot coolant out of the engine
(although indirectly, it still does that). Once the thermostat opens, the
coolant that previously had been bypassing the radiator is now blocked off and
will divert there to take advantage of the air flow.
Many
modern cooling systems are different now than they were in the days of the
small-block pushrod V-8, for example, in that the thermostat is on the "cold"
side rather than the "hot" side. In simplest terms, this
means that the thermostat, when open, lets the "cooler" coolant in
from the radiator instead of letting the hot coolant out of the engine
(although indirectly, it still does that). Once the thermostat opens, the
coolant that previously had been bypassing the radiator is now blocked off and
will divert there to take advantage of the air flow.
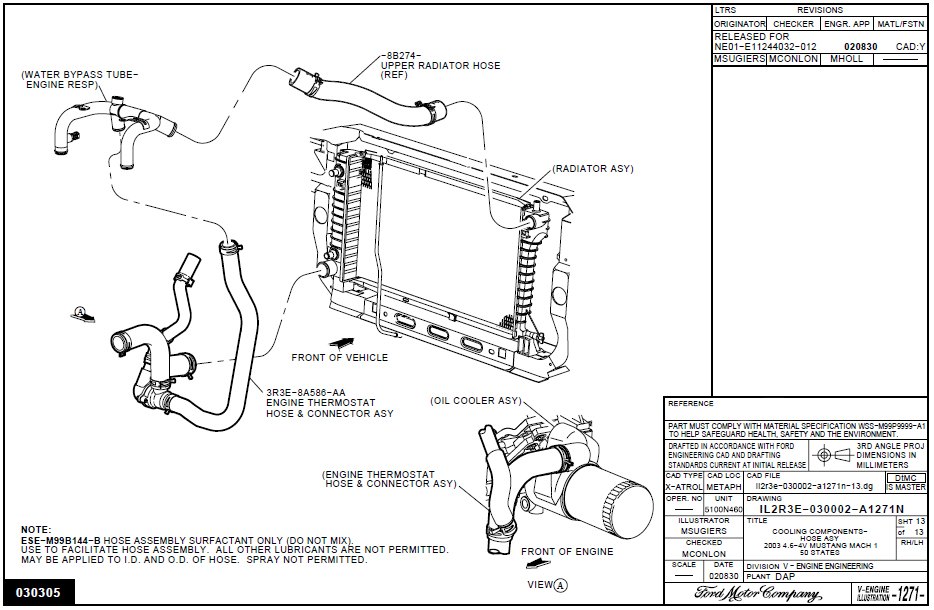
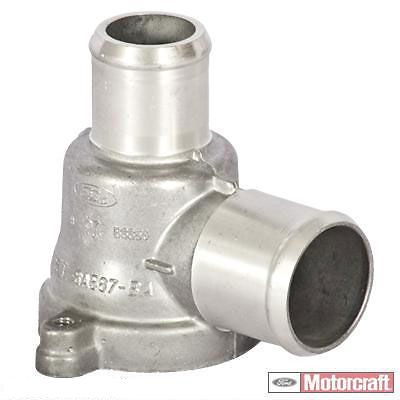
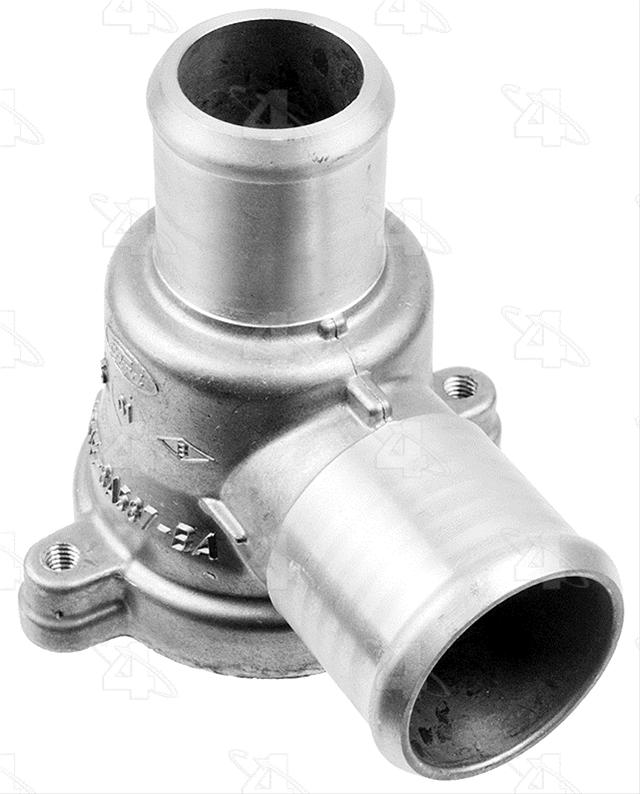
A system like this facilitates a quicker warm-up as the coolant stays clear of the radiator, and once warmed up, theoretically leads to more consistency due to the stable temperature of the coolant as it leaves the radiator. The Terminator is no different, and has its thermostat mounted in a remote housing just forward of the oil cooler/oil filter rather than on the engine block. This housing has also been the same for all DOHC Cobra's since '96, as well as the 2003 and 2004 Mach 1 (shown in a nice tech drawing for the Mach 1).
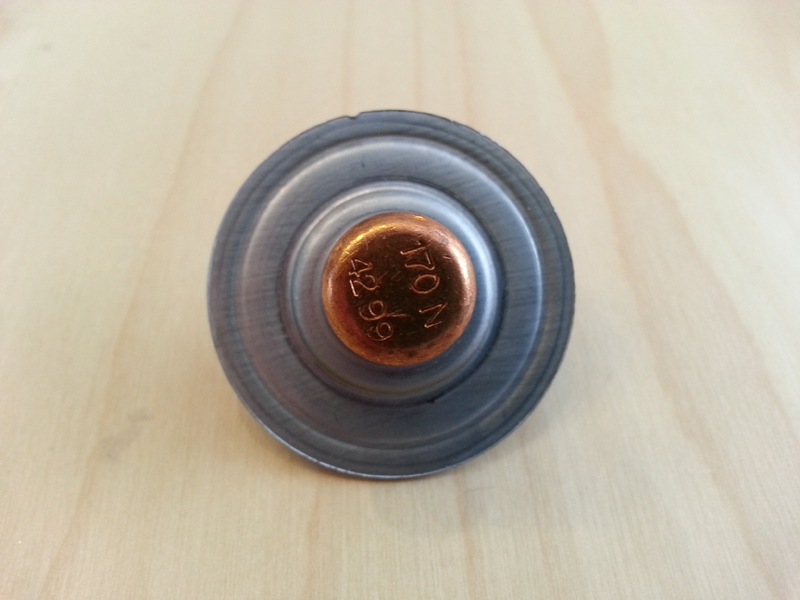
As I've already mentioned, the addition of the vented hood along with the ceramic coated exhaust manifolds made a dent in the temperature around my engine. Still, I wanted to knock off just a bit more, especially where the internal heat is concerned (this was all before the Whipple, which in itself helped nicely here as well). From the factory, the Terminator comes with a 180° thermostat, but what is perfect for it is one rated at 170°, which is obviously the next step down (and one with an actual 170° "heat motor", not just a lighter spring). Since the OEM thermostat is fully open at temperatures close to 200° - or more - and the factory fan settings are on the high side, these cars just run hot and need some help.
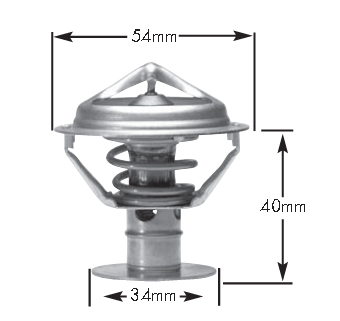
Unfortunately, the thermostat housing is sized specifically for the OEM thermostat or its equivalent, (such as the Stant 14138) so the substitution of one from another vehicle is not feasible. The thermostat also has to act as a barrier to the coolant coming from the engine when it is open (i.e., at the crossover), so the flange at its base has to seal that line, necessitating a specific fit. If the thermostat does not do an adequate job of blocking the hot coolant, it will simply be mixed in with the cooler fluid that is circulating from the radiator. This, of course, would negate the whole purpose of a lower-temp thermostat. While there are still plenty of "factory" 170° thermostats out there, none of them really work here due to their poor fit.
Note: If you've replaced your thermostat, it becomes evident that the factory aluminum housing is a bit on the flimsy side. Not only are the 6mm bolts known to strip, they can easily break off in the flange (they are M6-1.0x25, by the way). If something like this happens and you find yourself needing to replace that half of the housing, not to worry, it is not that expensive. It is actually readily available, usually for less than $40, under the Motorcraft part number RH-70, or through Ford as F6ZZ-8592-BB. As an alternative, look up Four Seasons 85173 or Dorman 902-1014 - both identical and can even be found for around $20.
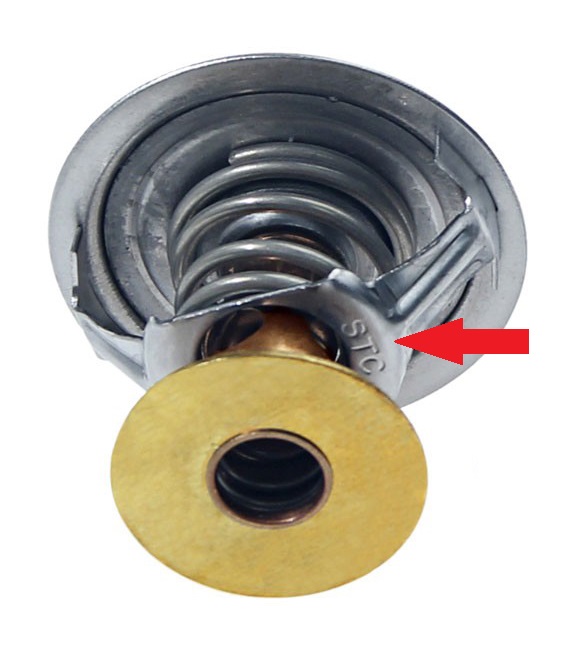
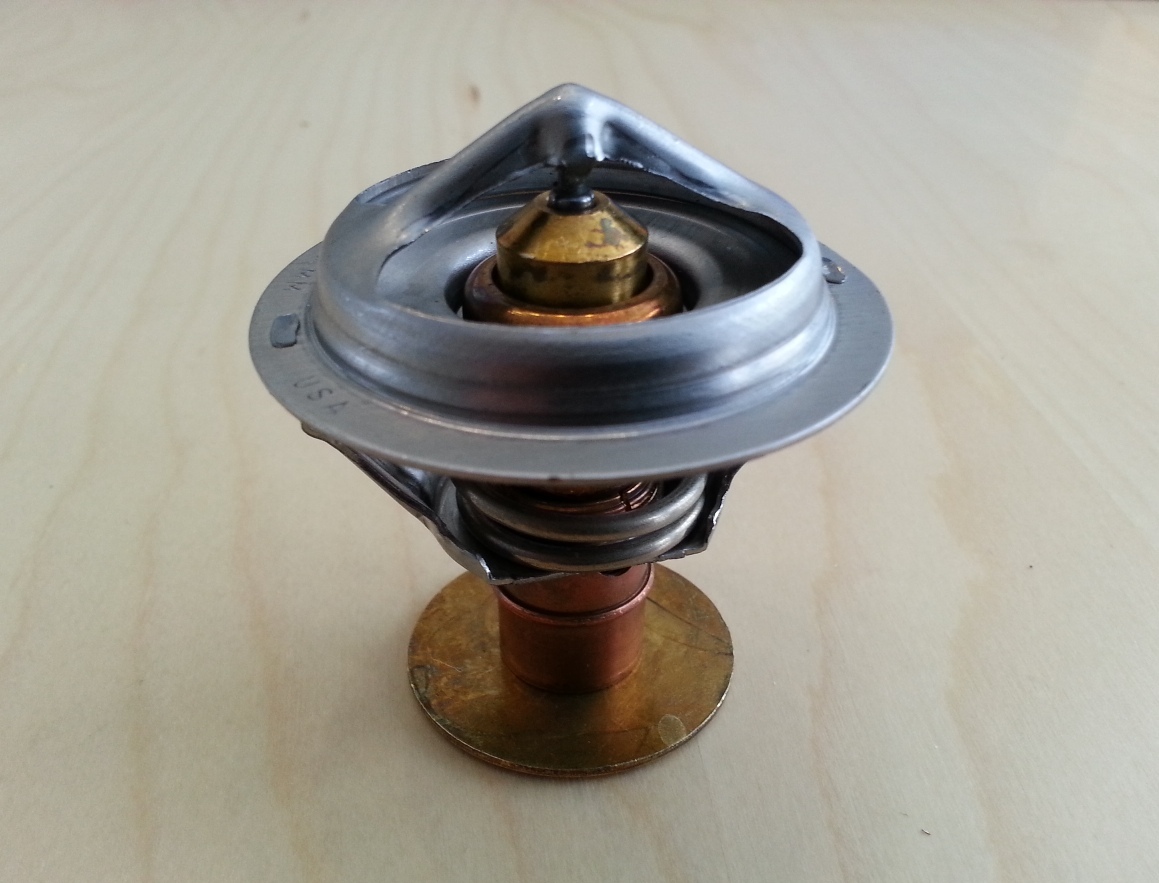
Being a tinkerer, I decided to tackle this on my own. After some research courtesy of a rep at Stant (their catalog, actually), I realized the solution is rather inexpensive, and amazingly simple. In a nutshell, it's an already available thermostat with its larger flange O.D. machined down to fit - not rocket science at all. Alternatively, if you have nimble fingers, you can transplant the heat motor from one in to the body of the other. While there is a higher priced option out there already, it is not high-tech either and has been tweaked in the same manner. If you need convincing, take a look at the bottom of its body for the "STC", or Stant Thermostat Corporation stamp. Stant, by the way, makes the OEM Motorcraft thermostats.
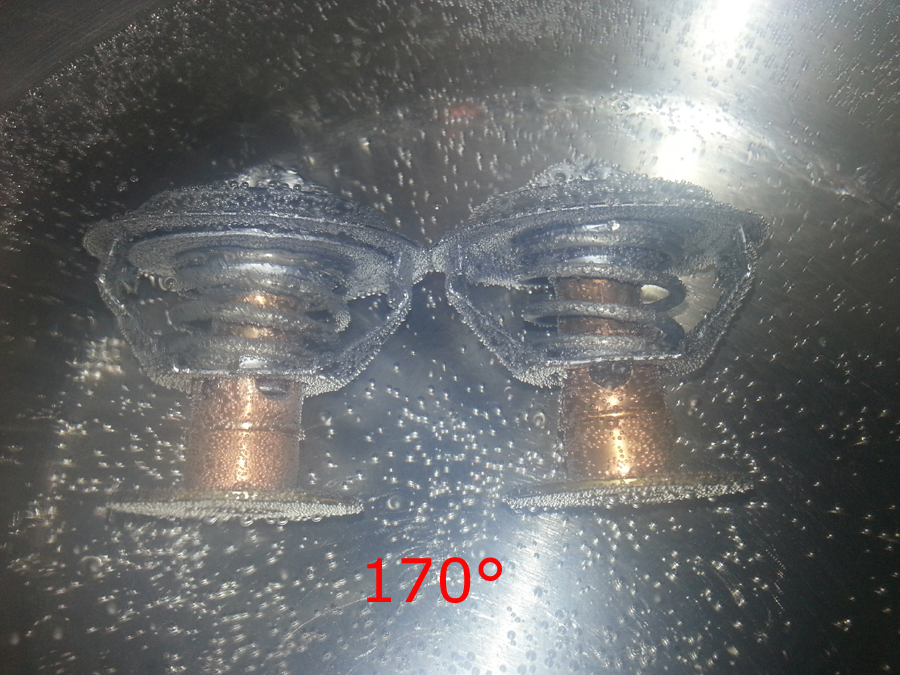
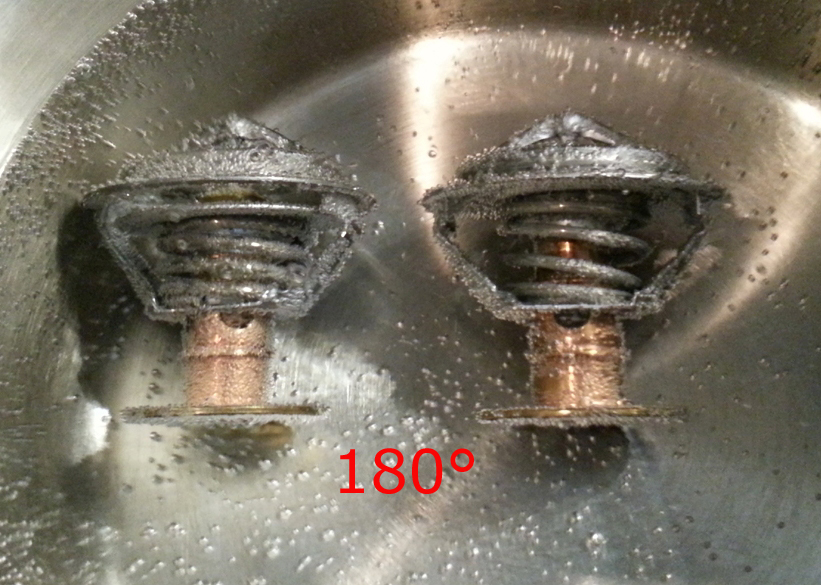
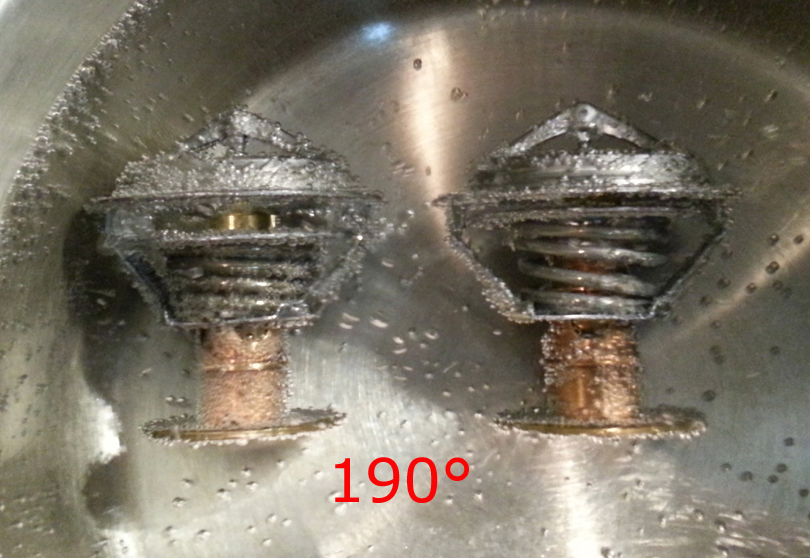
Does it work? Of course. They begin opening at 170° and are completely opened at 190°. Even better, the dimensions are the same as the one Ford installed in Dearborn - an exact fit in the factory housing - which means precise coolant flow. The pictures below show a sequence of mine (on the left in each picture) alongside a factory thermostat at 170, 180, and 190°, left to right. The factory piece just started to crack as it passed 180° (which was right after I took the center picture), and as it approached 190°, it hadn't opened as much as mine already had at 180°. Nothing like pictures to put it all in perspective.
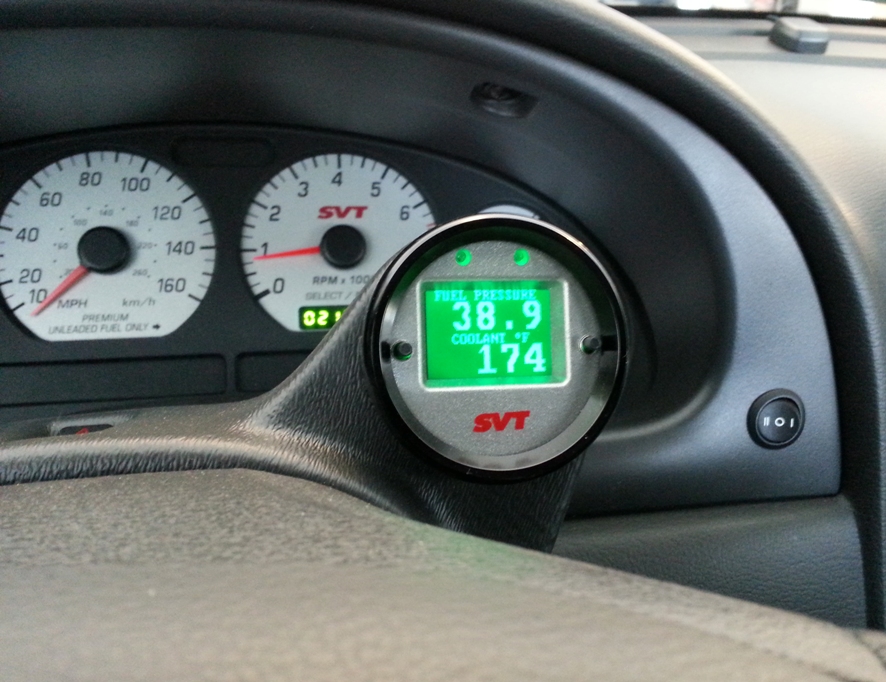
So there you have it: an OEM-quality thermostat that is ideal for reducing the engine temperature of your Terminator. With one in place in my own car, the engine rarely sees temperatures above 190°, which is absolutely perfect. They are also U.S. made, so even better. As much as I despise using the phrase "Termi", I had some fun with this by calling it the Termi-Stat©, and sold them quite well for many years. As the craziness of 2020 rolled along, other responsibilities of life became a priority and I decided to take a break from producing them. Not to worry though, since anyone with basic mechanical skills can make this a complete DIY project for much less than what is being sold by certain parts vendors. For right around $20, you can build your own, and if so inclined, spend just a bit more and have a spare on hand. Nothing like helping enthusiasts save a little of their hard-earned cash!
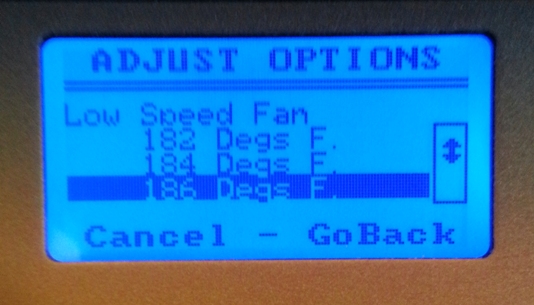
Note: With a new thermostat, you will not realize its full potential unless you change the fan operating settings. This is easy enough to do with a hand-held tuner (which most Terminator owners possess), or through the tune itself. With my SCT X3 tuner, you only have the option to set the on points for the low- and high-speed fan, but some give the option to set the on AND off points. Mine are set at 186° for low (which shuts off around 176°), and the high will come on at 190° if necessary. For the most part, you'll need to experiment in order to find what works best for you. In addition, you will want to use a coolant mix that is adequate for where you live, especially if the outside temperatures occasionally drop below freezing!
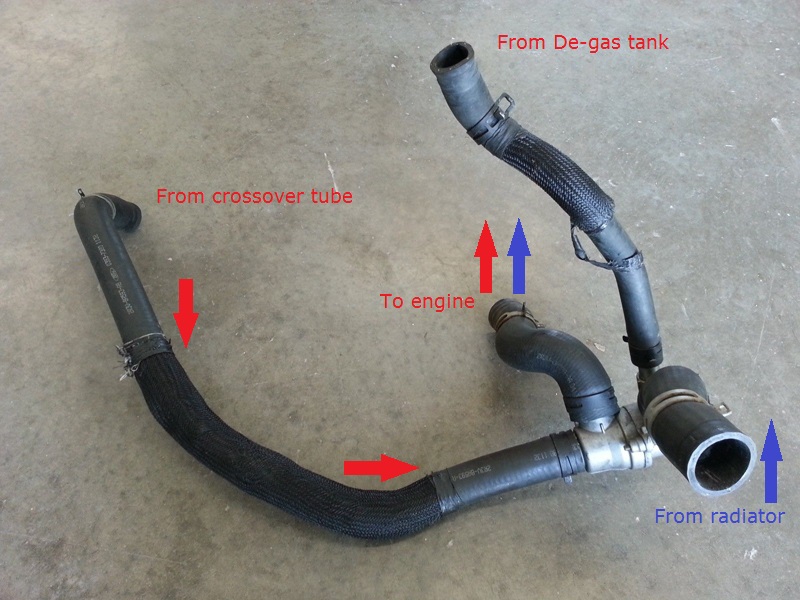
With all that has been mentioned about everything related to cooling, it never dawned on me to comment on the hoses. No matter, this section gets to be my first update of 2019 and a worthwhile addition, albeit a small one. While mine are all in fine shape thanks to low miles, I decided to do some digging to see what is still out there. I initially got a kick out of finding a Cobra Hose Guide on LMR's site that used my pictures from the above section: welcome to everything on the internet being up for grab! Oh well, glad to see some people actually are paying attention, especially since it saved me from having to look up all the part numbers.
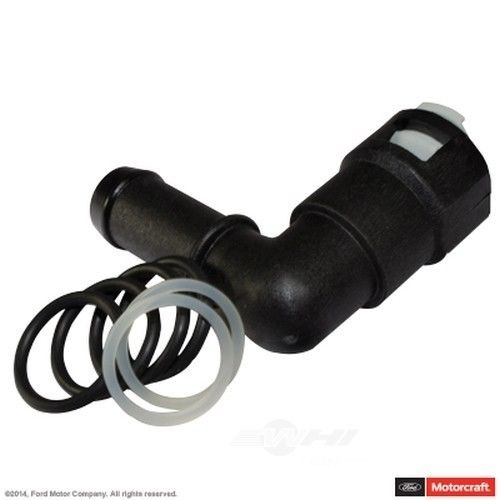
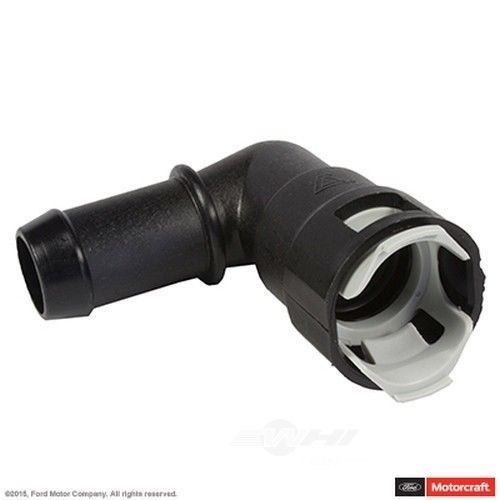
As it turns out, some of the Ford hoses are around in very limited quantity and others can be found through various auto parts chains in aftermarket form. Still, if you had to replace all nine of them - including those used for the intercooler - it may not be easy to track them down. I'll also add that the hoses in question are those "forward" of the engine: if you need the two attached to the firewall for the heater core, they are obsolete. Those you can probably fabricate using "Quick-Lok" elbow connectors, which are easy to come by in the 5/8" & 3/4" sizes such as the Motorcraft KT-90 and KT-92 as examples.
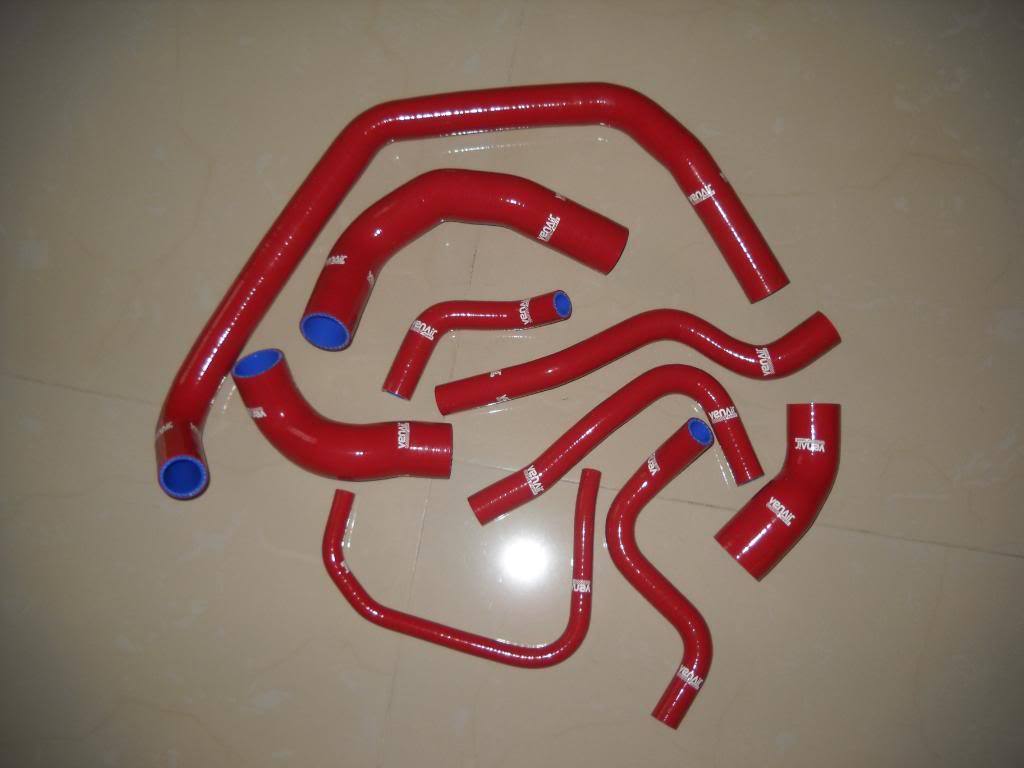
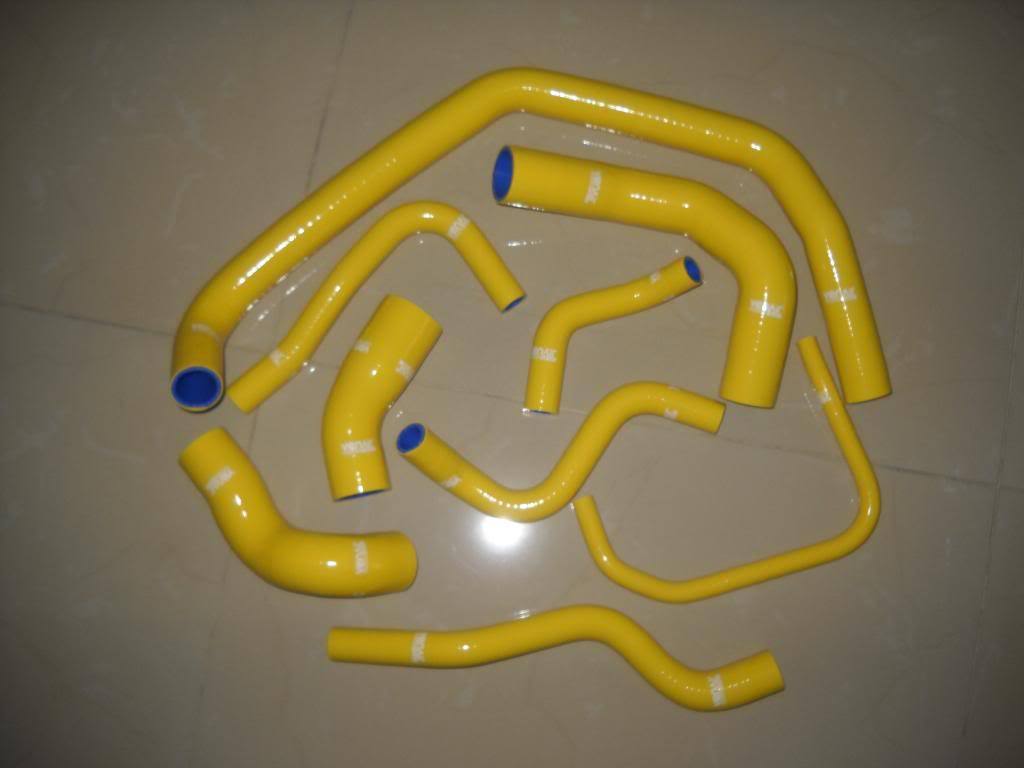
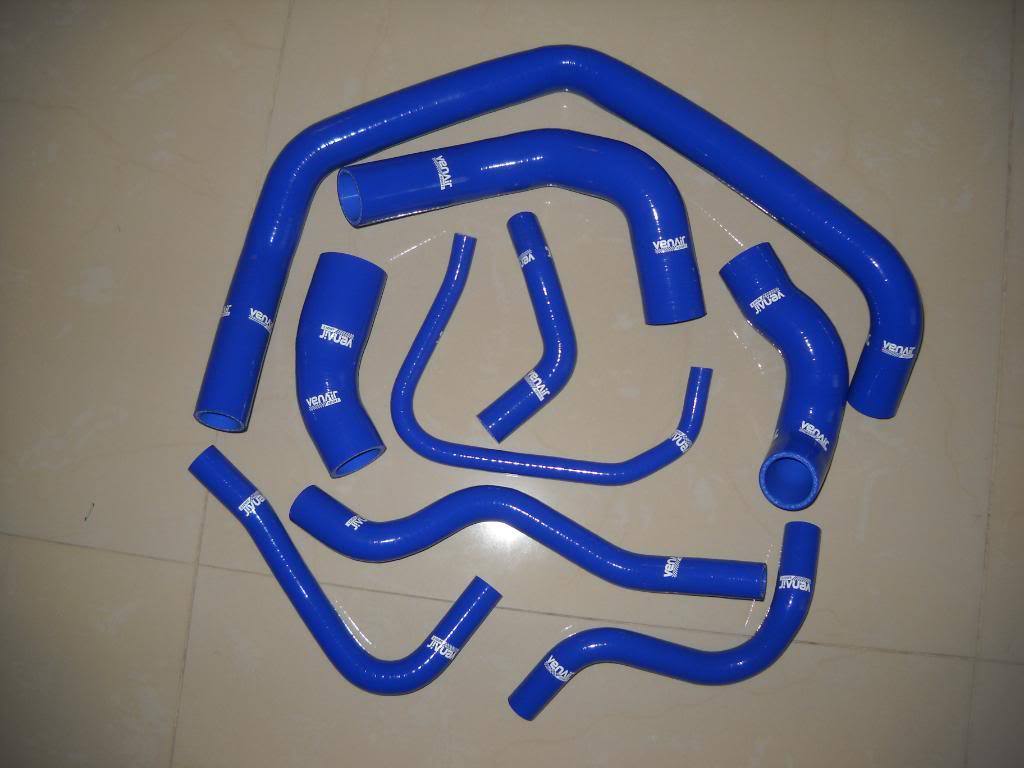
Otherwise, for the sake of increased durability, the way to go is with those that are made from silicone (although I'd admit that the factory stuff is not too bad). This type of hose is able to withstand not only higher temperatures, but increased pressure compared to rubber. Amazingly enough, there are two companies out there that make complete kits for the Terminator at a reasonable price - talk about keeping it simple. Shown below are examples of both, from California-based HPS Performance Products (on the left), and Switzerland's VenAir Sport (right).
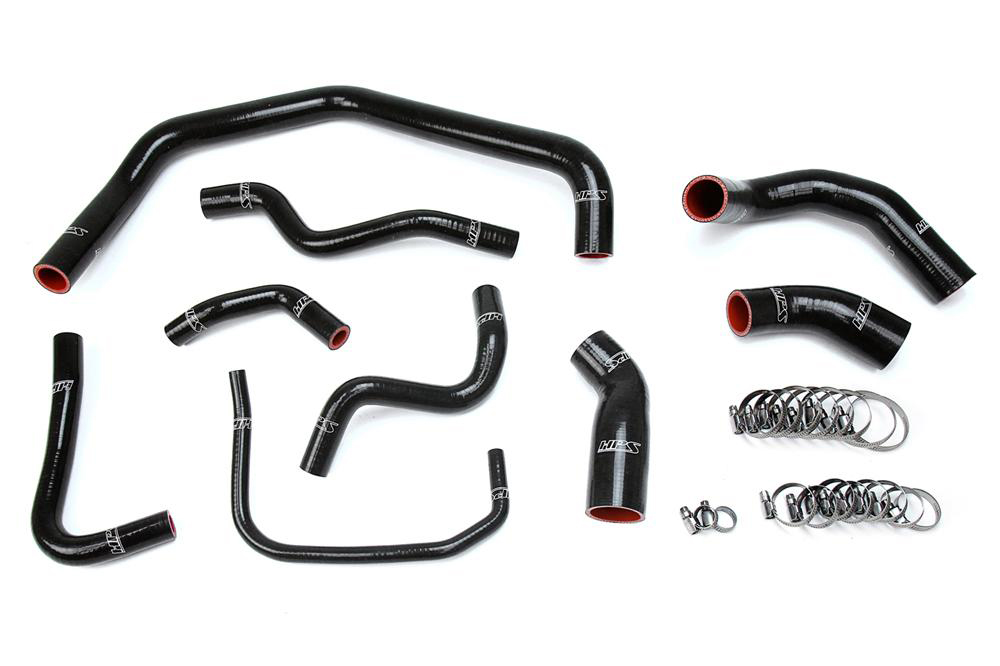
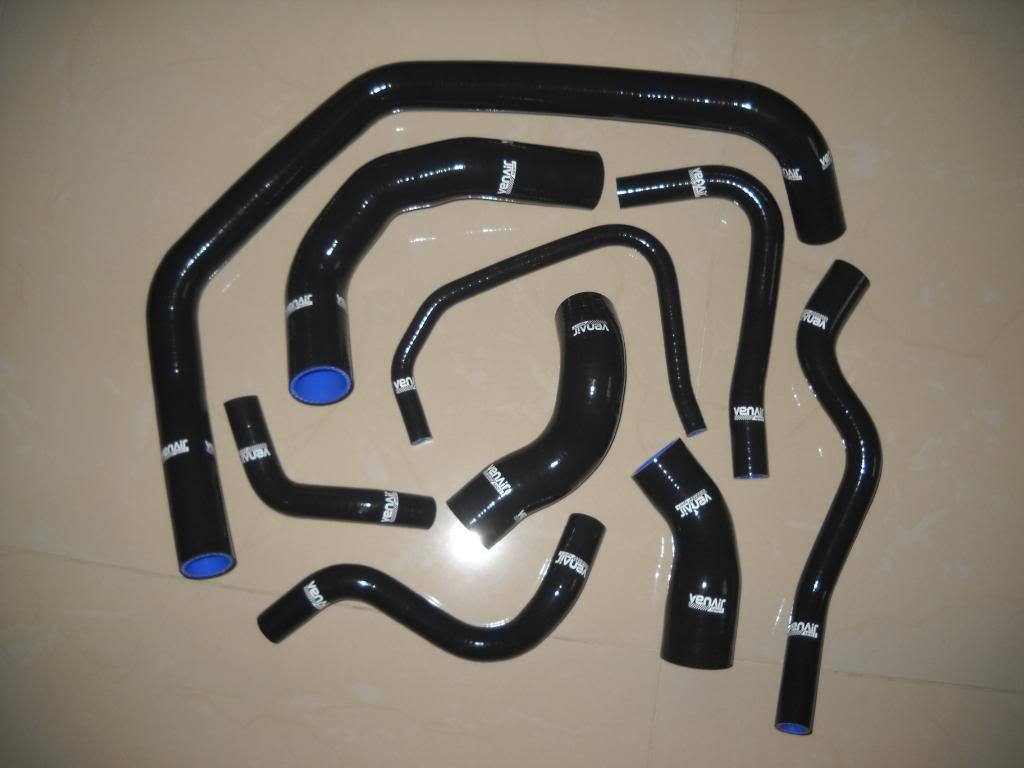
While I don't actually have any of these myself, from what I can tell, they are high quality and meant to last. Adding to that, they just look downright nice. If bling is your thing, even better since both places can produce them in custom colors such as red, yellow, or blue just to name a few (black is obviously standard). It is also worth mentioning that when it comes to hose clamps, you cannot use the standard worm gear kind since they will cut right in to the hose material - definitely not good. If you are like me and prefer the original spring-lock clamps, those work perfect with the VenAir kit, whereas HPS supplies non-perforated worm gear versions with theirs. I definitely might have to pick up a set soon enough, especially since my originals aren't getting any younger.
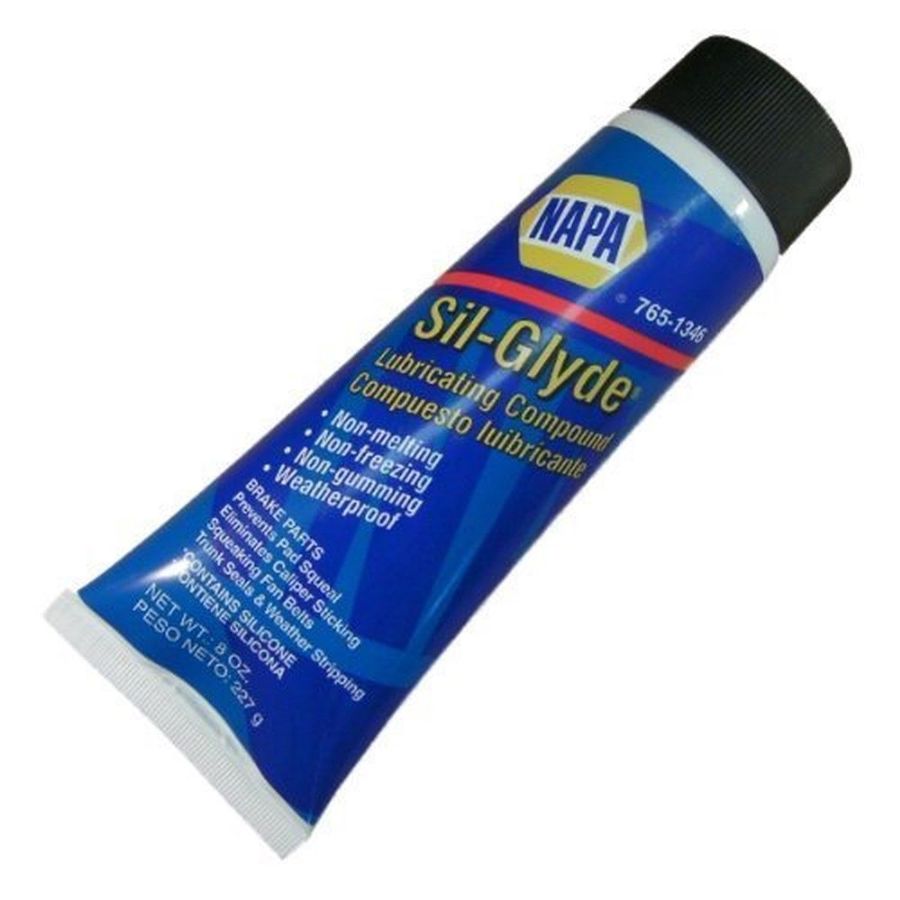
Note: When it comes to preserving all the rubber you still have, (including weather stripping) a fantastic product that I have used for years is called Sil-Glyde. This stuff works great, and can also be found through any NAPA as their 765-1346. While some might dig just using something for a temporary shine (unless you splurge for the pretty silicone hose kits), this stuff is actually beneficial. As a bonus, it can be used to lubricate lots of mechanical parts as well. Wipe on, wipe off - it doesn't get any easier.